
Want to make a shirred top or dress?
Let's get started!

I picked some of my favorite fabrics from my stash. Heather's Freshcut and some of the Penelope sheeting from Pottery Barn Kids. These were all a part of my Sweet Tweet collection.

You'll need:
- Two coordinating prints. One for the body, and one for the straps and ruffle. Of course you could choose more or just use one. And patchwork or strips of fabric would be fun too.
- Coordinating thread and ric rac if desired. I need to go back and add ric rac above my ruffles.
- Measurements: Chest, length from underarm to hem (for top or dress length) and from underarm over the shoulder for strap length.
- Rotary cutter, mat and ruler really make this project fast, but you can certainly do it without them.
- Elastic thread to hand wind on to your bobbin. Found in the notions isle.

If her chest measurement is 22" around then you would just need to cut two pieces of fabric that are 22" wide + 1" for a 1/2" seam allowance (SA) on each side. Since you are cutting two separate pieces, and the seams will be on the sides, you are making it twice as wide as her chest measurement. This is because shirring basically shrinks the fabric in half.
The length of the fabric will be the measurement from her underarm to the desired hem length minus the ruffle. I added a 2" ruffle and wanted the blouse to be 12" long from underarm. So I cut the length, 12" (overall length) - 2" (ruffle) + 1" (SA). I cut two rectangles that were 23" wide x 11" long. Make sure you have the pattern of your fabric in the correct direction.
*You should add about 1 extra inch in the length to account for the bodice shrinking up a little due to the shirring. I forgot to do that this time.
To cut out the ruffle pieces, my general rule of thumb is to make the ruffle twice as full as the garment. So if my front piece is 22" wide (finished), my ruffle will be 44" wide in just the front. I cut two strips that are 44" + 1" (SA) by 2" + 1" (SA), or 45" x 3". Remember to cut two of these.
* What if her chest measurement is more than half the width of your fabric? Most fabric is manufactured to be about 45" wide. But what if you needed to cut 2 strips that are 50" wide? You can either divide your 100 total inches by three and cut 3 strips...or...you could just ruffle it a little less full and get away with 2 strips.
And last, you'll need to cut two shoulder straps. I got a measurement of 9" from underarm, over her shoulder and back again. Again, because shirring shrinks the fabric by half, I doubled that measurement and got 18". Then I added 2" to allow for some overlap for where they are attached. No seam allowance here, the ends will just be serged. But if you don't' have a serger, add another 1" for a fold-over hem. I wanted my straps to be 3" wide so I cut them 4" to allow for a 1/2" hem on both edges. I cut my straps 20" x 4".
*But, if you are nervous about getting the strap length correct, just make them a good 6" longer than you think you need, you can always attach them lower into the bodice, or make a longer hem at the bottom of them or secure the shirring with a super tiny stitch along the bottom and tem cut them shorter. Or if you get them wrong, just make new ones. We often learn by making mistakes, right?
Step 3 {Hem Those Ruffles}
I only allowed for a 1/2" seam allowance on these so I sewed a narrow hem. Just fold it over 1/4", iron flat all the way around and then fold up another 1/4". You could also use a narrow hem foot on your machine or you could substitute a rolled hem on your serger.
The length of the fabric will be the measurement from her underarm to the desired hem length minus the ruffle. I added a 2" ruffle and wanted the blouse to be 12" long from underarm. So I cut the length, 12" (overall length) - 2" (ruffle) + 1" (SA). I cut two rectangles that were 23" wide x 11" long. Make sure you have the pattern of your fabric in the correct direction.
*You should add about 1 extra inch in the length to account for the bodice shrinking up a little due to the shirring. I forgot to do that this time.
To cut out the ruffle pieces, my general rule of thumb is to make the ruffle twice as full as the garment. So if my front piece is 22" wide (finished), my ruffle will be 44" wide in just the front. I cut two strips that are 44" + 1" (SA) by 2" + 1" (SA), or 45" x 3". Remember to cut two of these.
* What if her chest measurement is more than half the width of your fabric? Most fabric is manufactured to be about 45" wide. But what if you needed to cut 2 strips that are 50" wide? You can either divide your 100 total inches by three and cut 3 strips...or...you could just ruffle it a little less full and get away with 2 strips.
And last, you'll need to cut two shoulder straps. I got a measurement of 9" from underarm, over her shoulder and back again. Again, because shirring shrinks the fabric by half, I doubled that measurement and got 18". Then I added 2" to allow for some overlap for where they are attached. No seam allowance here, the ends will just be serged. But if you don't' have a serger, add another 1" for a fold-over hem. I wanted my straps to be 3" wide so I cut them 4" to allow for a 1/2" hem on both edges. I cut my straps 20" x 4".
*But, if you are nervous about getting the strap length correct, just make them a good 6" longer than you think you need, you can always attach them lower into the bodice, or make a longer hem at the bottom of them or secure the shirring with a super tiny stitch along the bottom and tem cut them shorter. Or if you get them wrong, just make new ones. We often learn by making mistakes, right?
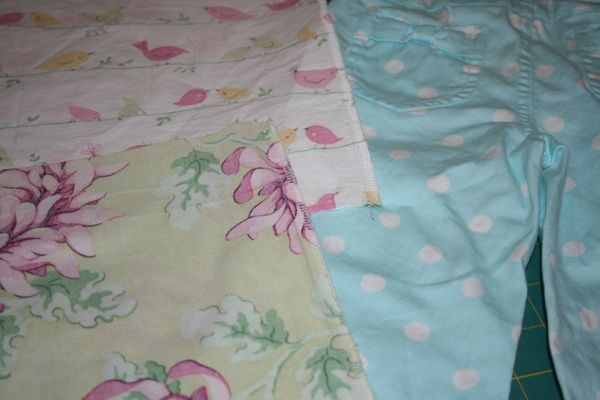
Step 2 {Sew the side Seams}
Lay your body pieces right side together and sew a 1/2" seam allowance up the sides. Serge or use a zig zag stitch to finish the seam. Do the same with your ruffle pieces (you'll be sewing the 3" side together).
Lay your body pieces right side together and sew a 1/2" seam allowance up the sides. Serge or use a zig zag stitch to finish the seam. Do the same with your ruffle pieces (you'll be sewing the 3" side together).

Step 3 {Hem Those Ruffles}
I only allowed for a 1/2" seam allowance on these so I sewed a narrow hem. Just fold it over 1/4", iron flat all the way around and then fold up another 1/4". You could also use a narrow hem foot on your machine or you could substitute a rolled hem on your serger.

Step 4 {Attach the Ruffles}
Pin your ruffles, right sides together, to the body. Make sure you have the ruffle fabric in the correct direction, with the hem not getting caught in the seam you are about to sew. If you've never gathered a ruffle, Sandi has a great tutorial here.
Pin your ruffles, right sides together, to the body. Make sure you have the ruffle fabric in the correct direction, with the hem not getting caught in the seam you are about to sew. If you've never gathered a ruffle, Sandi has a great tutorial here.


Sew/serge the ruffle on and then flip it down, iron flat and top-stitch.
I love ruffles that are ironed down! Is that weird?
I love ruffles that are ironed down! Is that weird?

Step 5 {Hem the Straps}
Sew narrow hems on both long sides of the straps. You could again use a rolled hem instead. I actually prefer this, but my serger won't do that anymore.
Sew narrow hems on both long sides of the straps. You could again use a rolled hem instead. I actually prefer this, but my serger won't do that anymore.

Step 6 {Shirring}
Sandi has a great tutorial on How to Shir, it's really easy-peasy, so I'll let her show you how. I was able to start shirring without changing any of the regular settings on my machine. Just hand-wind your bobbin with the elastic thread and try it on a test piece. Always, ALWAYS test it first before starting on your garment.
As I was sewing, my pieces started to shrink up, but the final shrinking comes when you blast it with steam from your iron. If you've never done it, it's really fun!
I just used the side of my presser foot to determine the width of each line. I started on the outside, flipping my fabric to the other end each pass, then just sewed the final line down the middle, pulling the fabric a bit taught as I went.


You really need to pull on the strap or you will have a bunched up HOT mess if you don't.

Here they are before I tied off all the ends. You can see why a rolled hem is prettier, mine curl and you can see the underside of the narrow hem.

Now do the same thing with the top of the body. I shirred 3 rows at the top and then left about 1.5" of space before the next series of 3 started. You can use an erasable marking pen or chalk to mark your next starting line (do this before you start any shirring), but I've got a screw hole on my machine that I just held my fabric up to, giving me the desired width.
You can also shir the entire bodice section, without any space. It just depends on the look you want.
You can also shir the entire bodice section, without any space. It just depends on the look you want.
I just had to lay them out to take a look at all the prettiness awaiting my girls' wardrobe. This is FUN!

Step 7 {Attach the Straps}
Serge along the unfinished, short, edges. You could also sew a tight (close together) stitch to secure the ends and then zig zag them so they don't unravel, or you could fold them over twice and hem them but that adds a bit of bulk.
Serge along the unfinished, short, edges. You could also sew a tight (close together) stitch to secure the ends and then zig zag them so they don't unravel, or you could fold them over twice and hem them but that adds a bit of bulk.

Pin them on to see where you like the placement best. One thing you also need to keep in mind is how heavy the body of the top/dress is. If you made this dress length, the body will be heavier and stretch the shirred straps more than you might think they would. So you would need to adjust for that when you pin the straps on. This is a hard thing to get perfect if you are doing it without the one who will wear it by your side. But you can. Just hang it on a hanger and pull on it yourself until you think it feels right. Sorry that's pretty vague but it's a trial and error kind of thing.
I made these blouses because so often store bought clothing is too short on my long-waisted girls. Either that or their pants are too low in the rise. We see a little to much in the backside when that happens. But I found when she was playing on the swing-set later, it's still not quite long enough to cover her when bending over. She needs an extra inch of coverage. I'm going to just add a second ruffle under the first one and then it should be perfect. It's a good thing I hadn't already added that ric rac!
I made these blouses because so often store bought clothing is too short on my long-waisted girls. Either that or their pants are too low in the rise. We see a little to much in the backside when that happens. But I found when she was playing on the swing-set later, it's still not quite long enough to cover her when bending over. She needs an extra inch of coverage. I'm going to just add a second ruffle under the first one and then it should be perfect. It's a good thing I hadn't already added that ric rac!


I ended up placing my straps 3" out from the side seams. That means I stretched the bodice flat and then measured 3" and put a pin there to mark it. Then I pinned the strap so that it starts a bit below that first section of shirring.

I sewed from the backside, between those bottom 2 rows of shirring (in the top section). I used a thread color that would match the fabric in that spot (white instead of pink).

Oh and look at what I get to stare at every time I sew. That is, when my eyes aren't on the task at hand. Have you made these yet? No? Add it to your list right now!

Here is what that line of stitching looks like from the top.

Then flip it over and, pulling the strap a little bit taught (not too much or it will make the blouse cinch up there), sew below the top hem and the first line of shirring.

Trim your threads and you are done!
Now, before I show you my finished blouses, I will dissect for you a few of my past creations. Because I'm never fully happy with how things turn out, there is always something I wish I would have changed.
I made this dress last summer. I shirred 2 rows on the outer edges of the straps and that ended up not being quite enough support for the weight of the dress. I should have either made the straps wider or shirred the whole width of them. I'm actually not digging the fully shirred strap shown in this tutorial, so I think I should have made them about 2" wider and had a couple more rows of shirring (maybe closer together). If she tugs on the dress, as kids are prone to do, she gets a little too exposed because it's so stretchy. More shirring would have made them stay in place a little better. But you can see that the length of the straps is good.

Here is the first shirred blouse I ever made. I really LOVED this one, even though it's not quite perfect. The straps are proportioned correctly, but a bit too short. You can see the side of the bodice folding over a little bit. I also started the first row of shirring a little too low. It ruffles out a bit too much for my taste. So, again, not perfect.


This one turned out pretty cute. I made the straps wider and set them about 1-2" away from the side seam so they would look more like a little cap sleeve. What I don't like about this one is the fully shirred bodice. Especially when you get to the bigger sizes (5T and up) it just looks cuter with the little bubble between the top and bottom rows. More blousey.

That was such a FUN dress! The first thing I ever made without a pattern (and with my old point-and-shoot...Eeeek!).

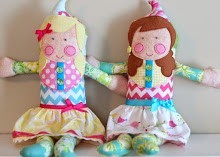
Now for the finished blouses...


And off to what they really wanted to be doing...

So, looking at these photos, I realize that I should have doubled the open space between the shirring and not fully shirred the straps. You know what they say about hindsight. I just wish I had thought of all this before I decided to give you a tutorial. Geesh! But they still make some pretty cute play clothes.


Make a Shirred Top is linked up over at

and

and

and

and

and

and

Check these sites out for more fun projects.


29 comments:
Too cute Angel!! You are so talented!! Have a lovely weekend.
Cute cute and even more cute are there adorable flower headbands...gorgeous!!!
I was already planning on making my niece a shirred dress for her birthday but I am planning on shirring just one side of the straps so the other side looks like a ruffle. Hope it turns out and is strong enough to hold it up :)
Always love reading your tutorials!!!!
Super cute and gorgeous fabrics! Great tutorial - I may have to try! Stop by the Sunday Showcase party if you get a chance! This is so precious - I really want to make one for me!
Made this top today. It turned out great. The tutorial was excellent. My machine was trying to pick a fight with me when using the elastic, but I got it done.
Thanks for the cute top idea, tomorrow, I will make another for my other daughter who is green with jealousy at the moment.
LOVE the look of the shirred straps. Beautiful fabrics, beautifully made, and beautiful girls. Have a happy day.
Thanks ladies!
Amber I think it will be fin, if it stretches too much, add rows of shirring between the rows you already make (meaning, have them closer together than I did in this example).
Thanks Stephanie, I just linked up.
Bekks, that's great! I'd love to see a pic. You can e-mail me at tadacreations@gmail.com
I love the dresses, and I really love the black and white face pictures in the background of the one where you show the front and back of the shirt. Did you do those silloettes? How? Please email me the instructions or where you had them done. (dskous@netzero.net)
Hi Kim, thanks! Here is the tutorial for the silhouettes of my kiddos.
http://tadacreations.blogspot.com/2010/04/room-re-do-part-vi-silhouettes.html
I could kiss you right now!!! I was just at Naartje and almost fainted because I calculated how much I would spend on this type of style for both my girls. I'm not advanced at sewing, but have it deeply embedded in my ancestry, so I will give it a try. Thanks for this post:) So glad we're "BFFs"-glad you friended me!
xLorie
LOVE LOVE LOVE THESE!!!!!
Great tutorial! I am sure to make some of these.... Did you made the traps wider for the dress so you get a sleeve???
Love Miranda
Love it! Thanks for sharing! It will make a great summer dress.
Thanks so much for stopping by and linking up to the Sunday Showcase Party! I greatly appreciate it! This is simply adorable! Hope you enjoy your week! ~ Stephanie Lynn
First time at your site. Such cute tops! Did you make the little girls cute pants with the ruffles? Did you use a pattern or do a tute. Thanks!
Too too cute! I'm really into the shirring right now, so I am so trying this one. Thanks for sharing!
Autumn
TheFickleHobbyist.com
Hello - Just wanted to let you know I'm featuring your project today. Stop by and grab a featured button if you like. Thanks so much for joining the Sunday Showcase Party! ~ Stephanie Lynn
Excellent fabric choices!
I'm totally bookmarking this, because it's exactly what I need.
Thanks so much, you're so talented!
Adorable! I really need to learn to sew!! Love the flower headband. I'm new to your blog. Love it!!!
Cute Cute cute! The girls are getting so big- I am loving these.. SO cute and comfy
A.D.O.R.A.B.L.E
I can't wait to try this one myself
Thanks so sharing such a fabulous tut
To all the new visitors, "thanks for stopping by." If you do make this, I'd love to see a pic. Feel free to leave a link here in the comments, or e-mail me directly at www.tadacreations.blogspot.com. :)
So cute, I love the fabrics! The birds are so sweet.
They are all so cute!! Just adorable! I love shirring and I'm definitely going to be making a handful of these for my girls! If you want, please stop by sometime and link up to my Thursday party Make It Wear It. This would be perfect! I'm so glad I found you!
Andrea @ TheTrainToCrazy.com
Angel,
Ok, hands down one of the cutest shirred tops I've ever seen! Love them! Thanks for joining the Craftaholics Anonymous party! I had fun stopping by and checking out your craftiness!
Linda
I included this in my Fun Feature Friday post today. ;)
Fabulous tutorial! Thanks.
Hi, thank you for sharing. Such a great tutorial! I posted your tutorial on my blog with a link back to your blog, hope it’s ok http://makeitandwearit.blogspot.com.au/2012/04/sundress.html
Please write me if there is a problem makeandwear@gmail.com.
Cheers!
Made this today! My daughter wanted to make a dress for her cousin who lives in Norway. It was pretty fast and easy. My local walmart didn't have any elastic thread so I just made do with elastic. Worked fine. Can't wait until they get some in so I can make it the right way for my daughter. It turned out super duper cute! Thanks for the tut.
OMG they're so cute! thanks for sharing
I love how you mix up your different prints, they always seam to meld despite being different. I'm to chicken t mix prints but I might take inspiration from you one day. The dresses are lovely.
Post a Comment