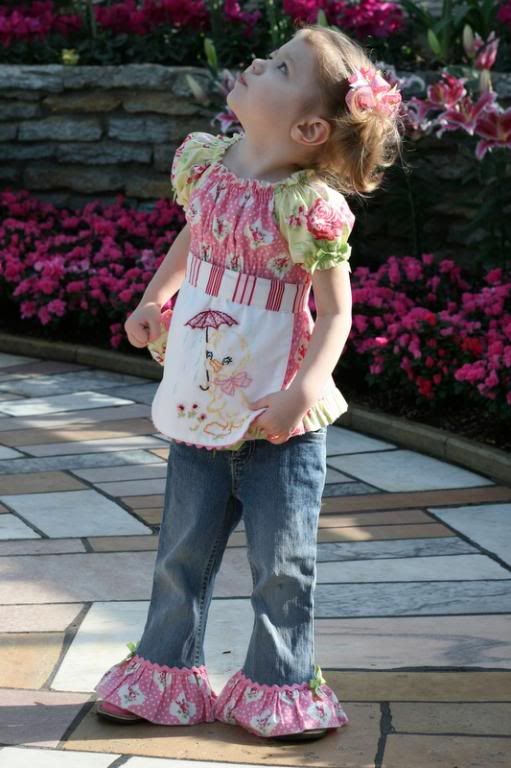
As always with handmade frocks, you can customize the length. I decided that well below the knee would suit our purposes best. These should last us through this summer and the next without getting too short as they grow.
You'll need:
- The ability to read a regular pattern.
- Simplicity #5695/1449 (view D) or something similar. The key is to start with a peasant dress pattern that uses one full panel for the front and for the back. You don't want the bodice to be a separate piece.
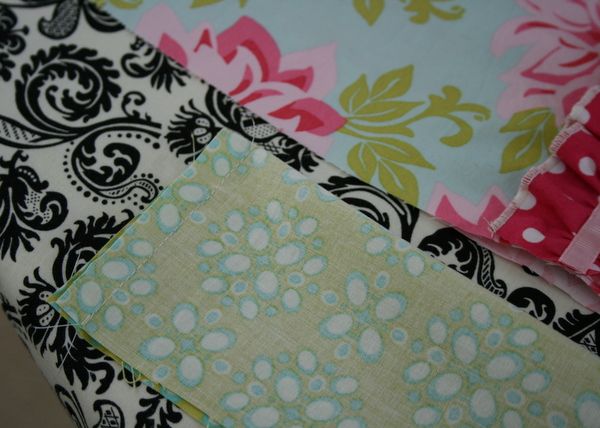
- Four coordinating fabrics. Follow the pattern for the amount needed for the body of the dress and the sleeves. Then add a 7" x 44" strip of fabric for the bottom, for sizes 4 and under. For larger sizes you will need 14" x 44" (read Step 7 before purchasing fabric, or just buy half a yard to be safe). You'll also need a 2.5" x 44" strip for the ruffle (make that 3" if you don't have access to a serger with a rolled hem stitch).
- Elastic for neck and sleeve. I used 1/4" wide, braided, non-roll elastic.
- Grosgrain ribbon, 3/8" for along the ruffle (this covers up the stitching the ruffle is attached with) and bow. Or ric rac would be fun too.
- Coordinating or contrasting thread for sewing and top-stitching.
- Cutting mat, rotary cutter and ruler. We'll be modifying this pattern a titch.
Step 1 {Measurements and sizes}
You'll need to measure around her chest and then the desired length for the dress, top of shoulder to hem. Her chest measurement will determine the size of dress to cut out. My girls both measure 22" around so I cut out a size 4 from this pattern. Size 3 says it fits chest size 22" but I want this to fit for 2 summers so I went up one size.
Step 2 {Pattern Pieces}
I start by cutting out my pattern pieces. I'm not talking about on the lines for a particular size yet. I just mean a rough cut away from the large piece of tissue paper, so they are easier to work with. Then I lay down my
Swedish Tracing Paper (you can use plain white tissue paper) over the tissue pattern and trace out the correct size from the pieces I need. I make sure to label it with the pattern name, number, size, etc... so I can reuse it later. Be sure to transfer all markings like grainline and foldline too. You never know when you might want to make another one.
We are using view "D" from this pattern so you'll need to find the following pieces that say they are for view "D", in the size you need. One sleeve piece, the front piece and the back piece. We are making our own bottom band so we won't be using their ruffle piece. That's it!
You are going to alter the shape of this pattern just a bit (see next photo). The pattern itself is slightly indented at the waist. But I wanted more of a straight and full dress. This will also help it to fit my girls for 2 years. In this photo the slightly curved line (on the right) is the original pattern line. I drew with my straightedge, a straight line that stands further away from the body (left line). This just takes away that little bit of shaping that was in the pattern. It doesn't look like much of a change, but multiply that by 4 (for both sides of the front and back pieces) and you'll end up with a more full dress shape.
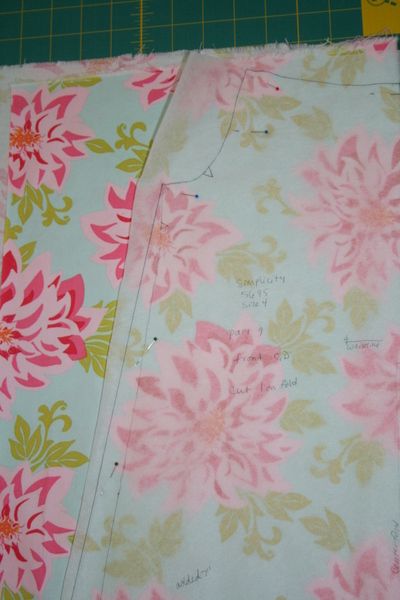 *though you can't see it in this photo, the new straight line extends all the way to the bottom and the bottom line extends out to meet my new line. So the bottom is slightly wider than the pattern was originally drawn.
When you draw out your front and back pieces you'll want to draw them to the correct length (or a bit longer since you can cut it shorter later). First measure from the top to the bottom of the back pattern piece. Compare this to the length you desire for the dress. This piece sits about 1.5" down from the top of her shoulder. Remember that we will also be adding a 3" band to the bottom, so subtract 3" from the desired length. Here is the formula I used. Or you could just cut the dress a bunch longer than needed and shorten it later after you try it on her (that's actually what I did for the first one, and then adjusted my pattern so they other 4 dresses matched).
Here is what I mean.
Finished length of our dress = 25.5" (of course your measurement may be different here)
Minus the 3" band = 22.5"
Minus 1.5" for the distance between the top of the back pattern piece and the shoulder = 21"
Add 1.25" to the pattern piece for seam allowance = 22.25"
So for my size, I drew the length of the back pattern piece to 22.25" (of course your measurement will be specific to the length you desire). I initially drew my pattern piece to the length they provide. Then I shorten or lengthen it to my needs by measuring the same distance all along the bottom edge and making dots that I can then connect for the new cut line. Be sure to make little "x's" along the old cut line so you don't accidentally use that line for cutting.
Then lay the front pattern piece on top of the back piece, line up the underarm point and the fold line and then draw the front piece's length to match the length of the back piece.
I hope I didn't just lose you here. I'm missing photos of this step and I know they would have been helpful. Sorry!
Step 3 {Cutting the fabric}
Go ahead and pin your sleeve pattern piece to your fabric, paying attention that the arrow for grainline matches up with the vertical grain of your fabric. You can fold your fabric in half and cut both sleeves out at once, or just cut one, flip the pattern over and cut the second. I do it this way so I can more meticulously line up the fabric print with how I want it centered on the sleeve. It's also helpful when I'm trying to eek out one more sleeve from just scraps of fabric.
Next cut out the front and back pieces.
Then, using your rotary cutter and mat, cut out a 2.5" strip of fabric for the ruffle. I use the full width of the fabric for this. Since it will be gathered, it doesn't really matter the length as long as it's anywhere from 1.5-2x the length of the center of your front pattern piece. A little more or less is no big deal. Seriously...it's not.
Also cut a 7" long piece. Don't cut it to the needed width just yet. We will measure the width of the dress later when it's assembled.
Step 4 {Assemble the dress and sleeves}
Using a 5/8" seam allowance
Sew together the side seams of your front and back pieces. Then serge the seam allowance or use a zig-zag stitch to finish them off.
Sew together the sleeves (underarm seams) and serge or zig zag the seam allowance.
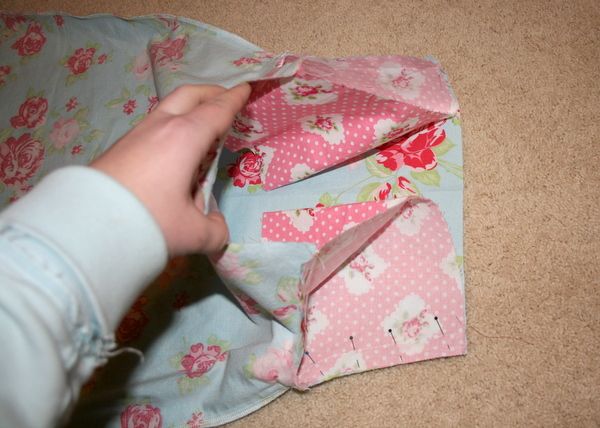
Now, turn the dress inside out and turn the sleeves right side out. Line up the sleeves inside the dress on the appropriate side. Match up the side seams and start pinning, working your way out to the edges.
You'll know you've got them lined up correctly if it looks like this. The sleeves are sandwiched between the dress pieces.
Now sew the sleeves to the dress and serge or zig zag the seam allowance.
Step 5 {Add the Ruffle}
Ok, so this part will be hard to do if you don't have a serger that can perform a rolled edge. Or if like me, you have a serger, but it no longer does a rolled edge, and you don't have a wonderful friend like Amy that let's you use her serger. See if you can find someone with a serger, or you can sew a narrow hem on both long edges. It's not ideal for this look, but it will still work. A narrow hem is were you turn the edge under 1/8" (iron it down) and then another 1/8" (iron it down) and stitch it. Your machine may also have a
narrow hem foot which you could use too.
*If you must go this route, you should cut your strip 3" wide to make up for the extra 1/2" used in the hemming.
Here is what it looks like with a narrow hem instead.
You should have already cut a 2.5" length of fabric in step 3^. Depending on the width of the fabric you are using, it should be about 44" long. Serge a rolled hem along both long edges. Then stitch a running stitch down the center. A running stitch is just a stitch at the longest length your machine will do, and you don't go back and forth at the starting and stopping points to anchor it.
Once you have the running stitch in place, pull on the top thread and start scootching (real technical, I know) the fabric down along the thread. When you get about halfway, tie a not at the top and then take the top thread at the opposite end and scootch the fabric down toward the middle. You'll want the ruffle to be the same length as the center of the front of your dress. Spread out the ruffle so it's even the whole length.
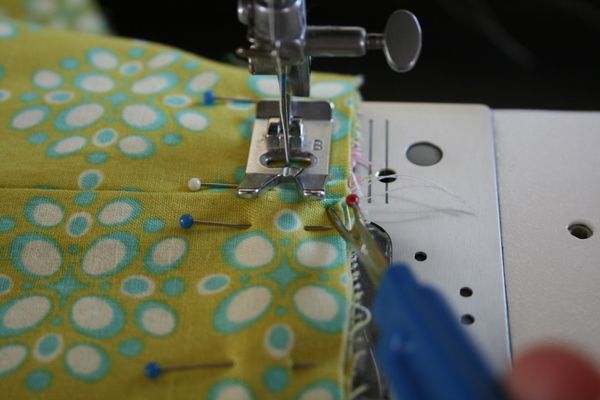
Next pin the ruffle to the middle of the neckline. I use my measuring tape to make sure I keep it in the center of the dress and then pin it about every 3" the whole way down the front. You don't need any of it to be gathered for the very top 5/8" as this will be folded under to form the casing, same goes for the bottom 1/2" since that will be sewn into the bottom seam.
Go ahead and sew the ruffle down along the center, just on top of the gathering stitch you made earlier. Be sure to change your stitch back to a normal size, since you just used it for the running stitch.
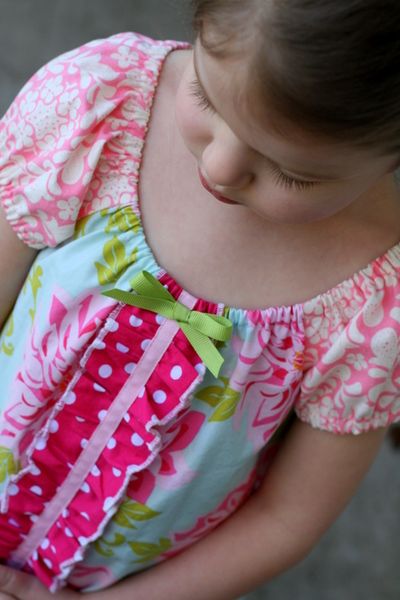
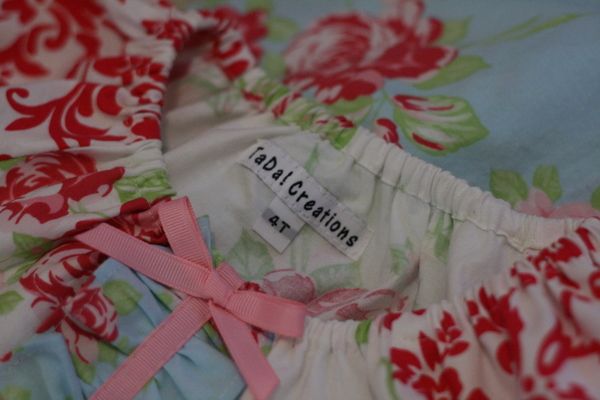
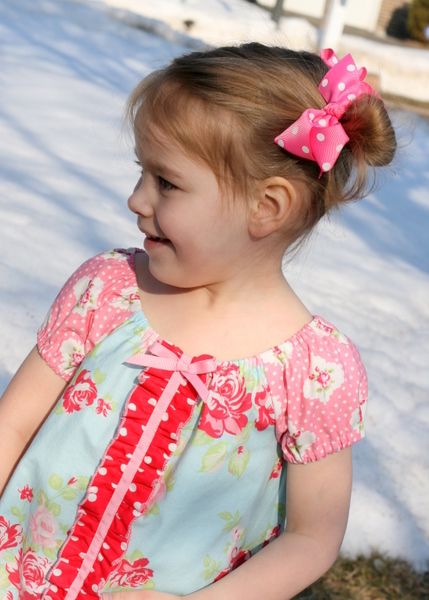
Now that your ruffle is attached, you'll want to sew down a length of 3/8" grosgrain ribbon to cover up those lines of stitching. I just cut the length I need and lay it down the middle and pull it taut as I stitch very close to both sides of the ribbon's edge. No need to pin, you should be able to hold it in place as your machine runs. Sorry I have no photos of this process, but here is the end result.
You won't be adding the bow until the very end. No need to worry about raw edges, as they will be turned under to make the casing for the elastic next.
Step 6 {Add neck and Arm Casing}
Per the pattern directions, you will fold both the arm and neck edges under 5/8" and iron it for a crisp fold. If the ruffle at the neckline overhangs the dress a bit, just trim it so it's straight. Now open it up and fold the edge under 1/4" this time, iron it being sure not to iron out the 5/8" line you just made. Don't reverse this step or you will end up with a casing that is too small to accommodate the elastic.
Now fold up the 1/4" edge you just ironed and fold it again on the 5/8" crease. I iron it all flat again at this point, with lots and lots of steam. You'll need to do some finessing to see that the ruffle doesn't stick up crazy-like.
Then stitch the hem down as close to the edge as possible. Leave about an inch at the center back of the dress and at the underarm seams of the sleeves. This is so you can insert the elastic into the casing you just made. Leave long enough thread tails so you can pull the outside thread through to the inside of the dress and tie them off.
There should be two thin rectangles on your pattern tissue. These are the elastic guides for the arms and neck. Go ahead and cut your elastic to those lengths. Attach a small safety pin to one end of the elastic and start pushing it in to the appropriate casing hole until it comes out the other end. You will just overlap the elastic pieces by about 1/2" and sew them together. I put them under my presser foot and lower the foot quickly to catch it before it can pull out. Then stitch back and forth several times. I usually shorten my stitch length for this too. Before sewing the neck elastic together, this is a good time to have her try on the dress and see if you prefer to cinch up the neckline a little bit.
Now stretch out the sleeve and neck elastics, distributing the fabric evenly all the way around. Pin the hole closed where you put the casing in and stitch it closed. I pull the thread tails from the outside of the garment, through to the inside and tie knots to secure them here too.
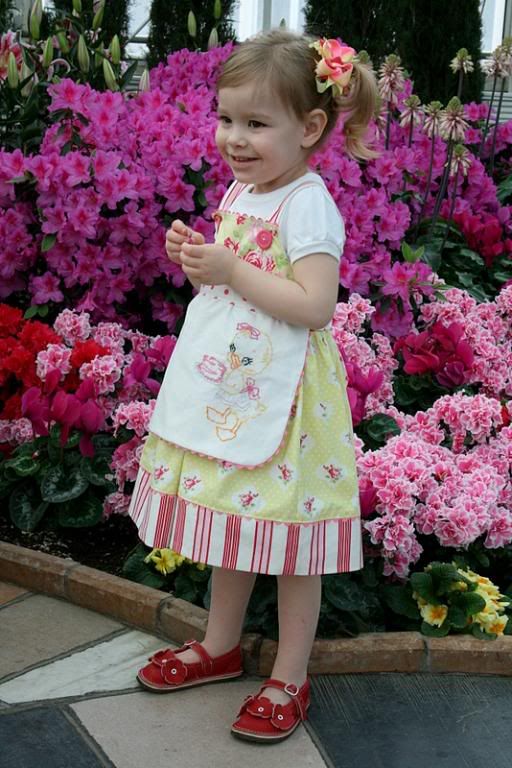
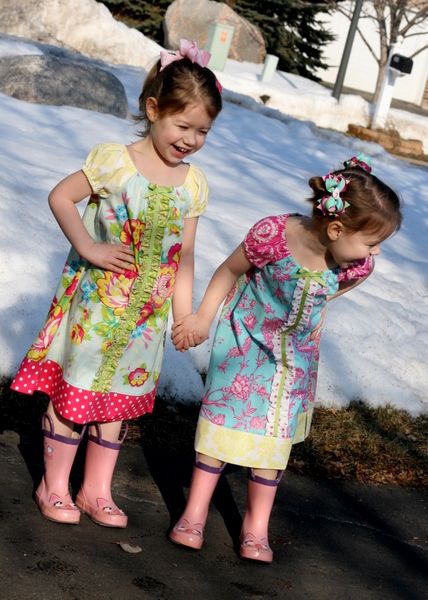
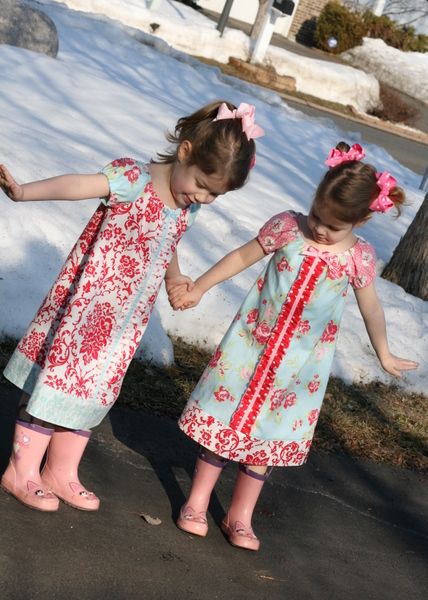
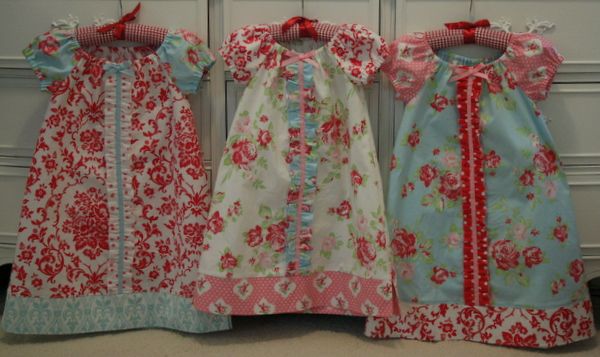
These three dresses were all cut from the same size 4 pattern. For the center dress, I cut the body of the dress shorter by 1", but it looks about 2" shorter overall because I also cinched up the neck elastic more than the other two. So I just wanted to point out that a tighter neckline makes for a bit shorter dress. If you start with it tighter, you can always remove the elastic and put in a larger piece so it's looser, giving her more opportunity to wear the dress.
 Step 7 {Add the Bottom Band}
Now you need to measure the width of the bottom edge of the dress. Ours measured at 20.5" wide. So I cut my 7" strip of bottom fabric to 21.5" wide. This allows for a 1/2" seam allowance at each end. I did find that some of the fabrics I used weren't quite as wide but I was able to sew a 1/4" seam allowance to still be able to get a piece for the front and the back out of that one 7" strip. This is also nice since it means that the fabric pattern itself will be the same on the front and the back.
If your dress bottom edge measures a lot wider because maybe you are making a larger size or the dress is longer and thus wider at the bottom, you will need to have two 7" lengths cut. There will just be more fabric waist. But that's Ok, you'll have an adorable little dress when you are done.
Now that you have 2 pieces of fabric that are 7" tall by the length you need, you will fold and iron it in half so it's now 3.5" tall. Turn it inside out and line up the edges to sew your 1/2" (or 1/4") seam.
Oops, looks like I didn't line this up as well as I had though. When I iron it right-side out, the seam will be slightly under instead of exactly on the outside edge. That's Ok, I'll just make sure it's on the inside of the dress later.
Clip the corners so you get a nice point when you turn it right-side out.
Oh look! I
do have a photo of the ruffle at the bottom of the dress. If that ruffle overhangs at all, just trim it even with the dress.
Now turn it right-side out and iron it flat.
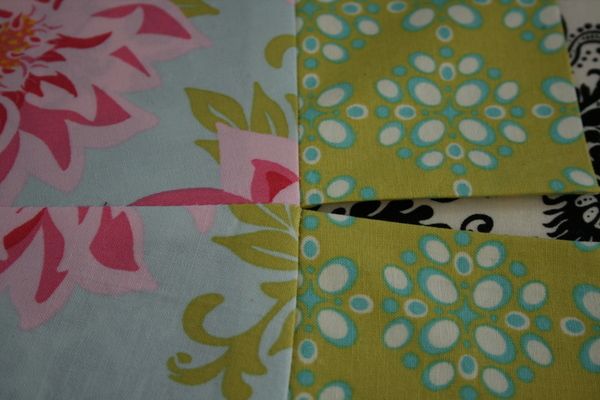
You will then determine which side you want face up and pin that side face down onto the right-side of the dress. Be sure you are pinning the open edges (raw edges) on top of the raw edge of the dress. Start by lining up the edge of your bottom band, with the side seam of the dress. Pin both edges at the sides and then pin it in the middle by finding the middle of both pieces. This way, in case you mis-measured your band width by something small like 1/4" it can be evenly distributed along the edge of the dress. You won't even notice it since you can stretch the fabric a tiny bit as needed.
There's that funky edge I didn't sew quite right. It's on the inside of the dress and you'd never know it was there (if i hadn't said anything that is).
Go ahead and sew the band on using a
1/2" seam allowance. I like to use something long (and not my finger...ouch) to make sure the edges stay in place, butted up right next to each other, while sewing. This will ensure a nice tight piecing together of the band and the dress at the side seams.
Serge the seam, flip it down and iron the seam up towards the dress.
Voila! That was pretty easy, wasn't it?
Now you can top-stitch the band. I started and stopped my presser foot underneath the ruffle in the front so that the ruffle doesn't get sewn flat here.
Step 8 {Add the Bow and She's Ready to Go!}
Tie a little bow using 3/8" grosgrain ribbon. Be sure to heat-seal the ends by running a lighter quickly past the cut edges. I use the long handle lighters because they are the easiest to operate. A match works in a pinch too, but it's not quite as user-friendly. Hand-stitch the bow down, right on top of the stitching that forms the elastic casing at the neck. This helps camouflage that line.
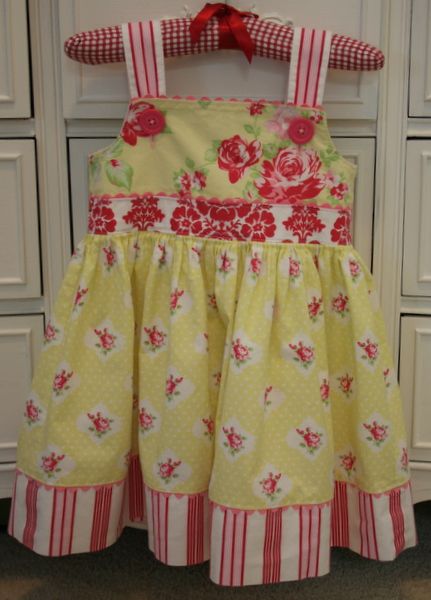
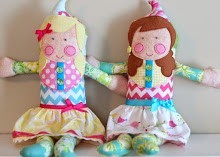
You're done!
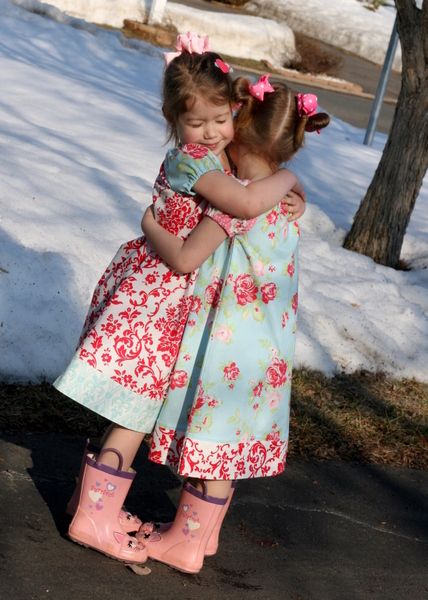
Now have her try it on and watch her light up knowing that you made a pretty dress just for her.
And give yourself a pat on the back,
you just made a one-of-a-kind Boutique style dress!