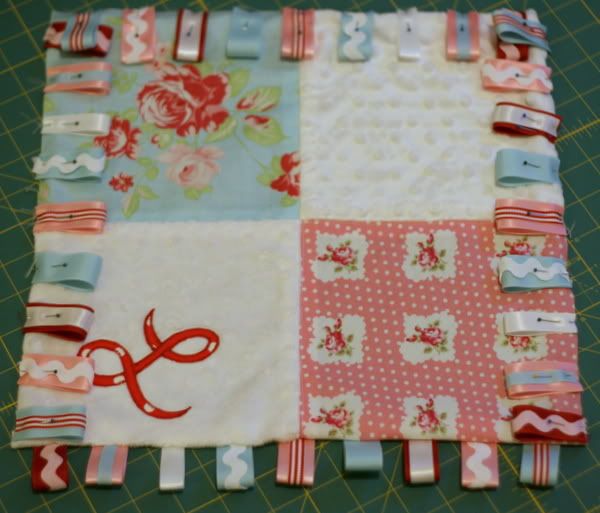
Want to make a Ribbon Baby Blanket?
Then, let's get started with my free tutorial!

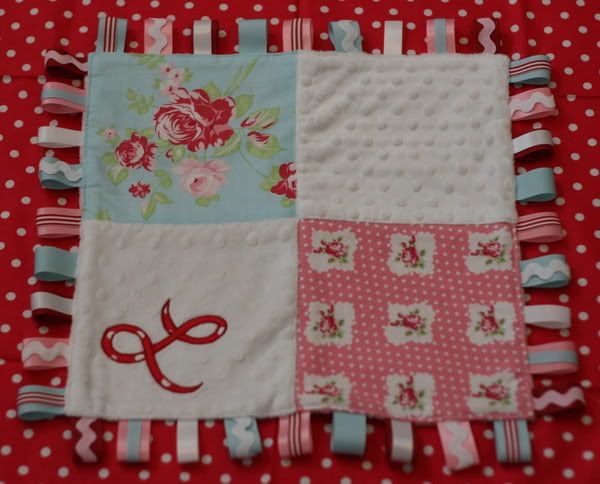
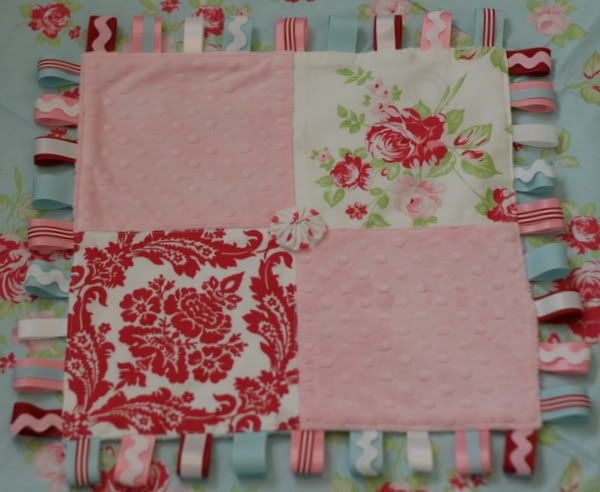
This blanket measures 14"x14" (excluding ribbon trim, which extends 1.5"). It's the perfect size for baby's hands or quick games of peek-a-boo at the changing table. Of course you can choose any number of squares in any size to make the blanket just the way you like. This is just how I make mine for gift giving.
*All seams will be sewn with a 1/2" seam allowance.
You'll need:
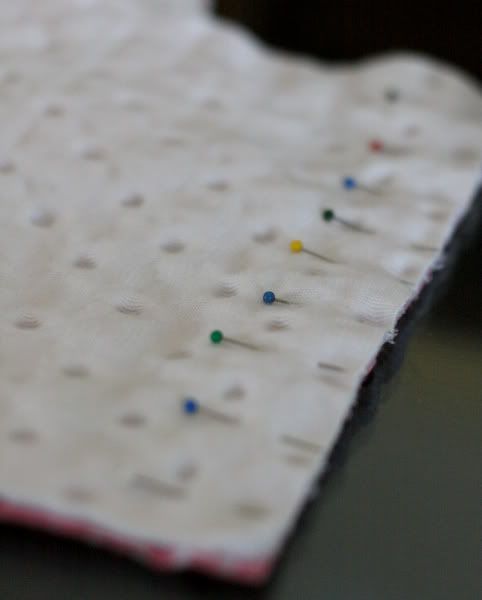
- (4) 8"x8" squares of coordinating cotton fabrics. Please prewash all fabrics as they are manufactured with harmful chemicals and sizing to prevent fading in the commercial environment. I've read that fabrics are actually treated with formaldehyde. Yuck! Definitely keep that stuff away from little ones.
- (4) 8"x8" squares of minky dot chenille or regular striped chenille. I buy my minky dot from Chenille Magic. It's so much softer than what you can buy at JoAnn, it's worth it.
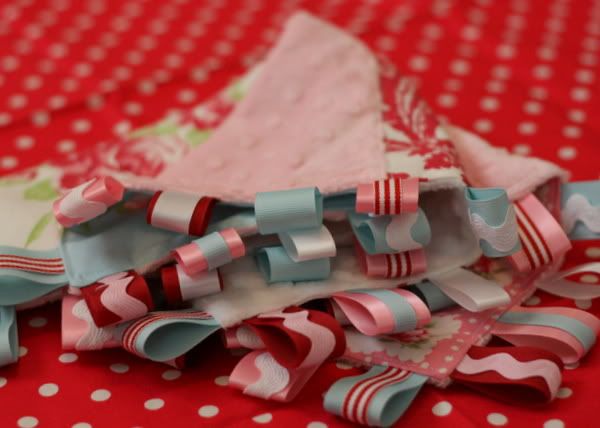
- 4" strips of a variety of coordinating ribbons and ric rac in different widths (I used 64 pieces). Stay away from ribbons with a printed pattern on them like polka dots. They are just painted on and the paint can come off in baby's mouth. That's why I like to use stripe ribbon, ric rac and layer for more interest Striped ribbons are woven and not painted on.

Step 1 {Cutting your pieces}
Lay your minky face down. I find it's easier to see the dot pattern from the backside.

When cutting the fabric squares, pay attention to whether you want the directional pattern to be on the diagonal or if you want it centered just so on the square. Cut with an eye toward what the finished product will look like. I used a combo of random and diagonal in mine. Please also note that there is a direction in the minky. You'll just want to keep it running consistent throughout the blanket.

Using your rotary cutter, mat and guide, cut 8"x8" squares from your fabric and minky.

Go ahead and cut your ribbon and ric rac strips to 4". You won't need them for a bit, buy you might as well get everything ready now. I use my rotary cutter for these too, it works pretty slick. I started by cutting 4 each of the 6 different types of ribbon and 2 ric racs I used. I later cut more as needed.

Step 2 {Sewing your squares}
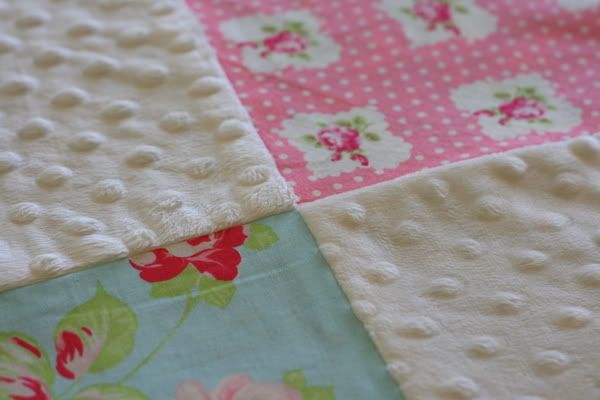
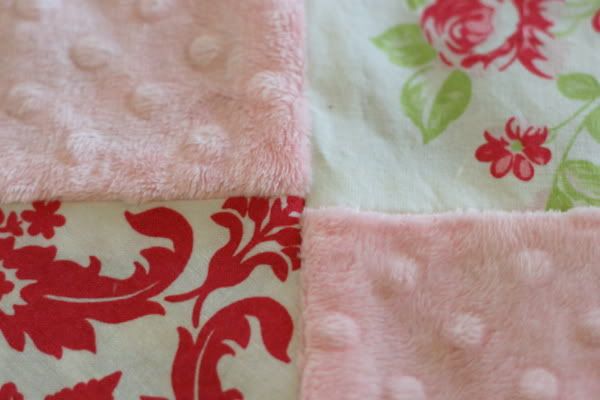
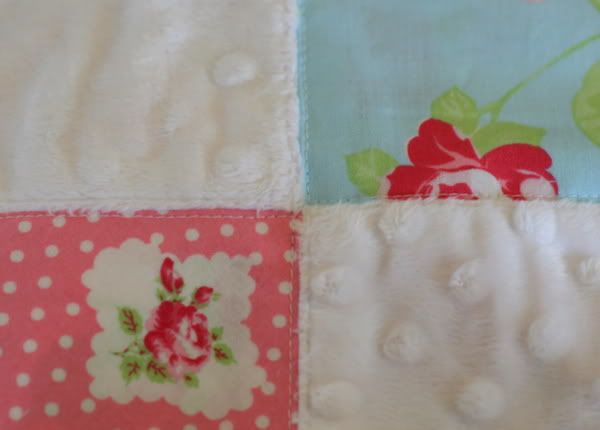
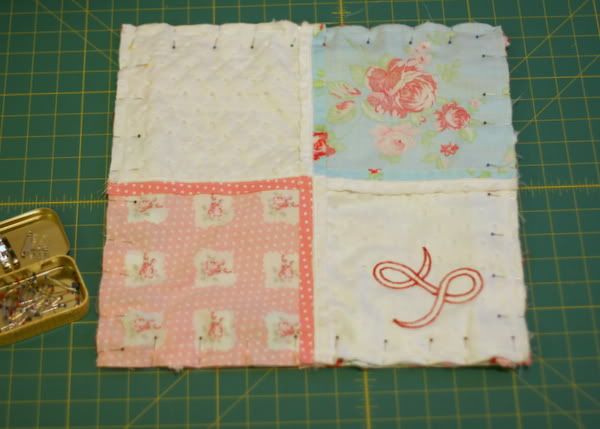
Arrange your squares in a pattern that's pleasing to you. I like to have the minky squares opposite each other when the piece is finished, so no one section is thicker than another. So when you see minky on the top, the underside of that square will be fabric, and vice versa.
Pin two adjacent squares, right sides together. And sew with a 1/2" seam allowance. Repeat with the other three pairings. Whenever possible, I like to have the fabric pinned underneath the minky. Just so there will be less stretching of the minky as you sew it. Eventually you will have no choice to have it on the bottom, but you can just use extra pins to keep it in place at that point.
*Just read on this blog that you should ave the minky on the bottom and use a walking foot and a longer stitch length. I've had no problem doing it my way, but you may want to try this instead.
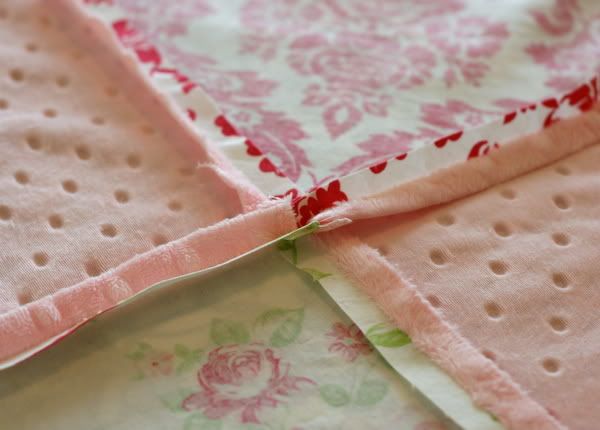
Lay out two of the four sets you have just sewn together and place them right sides together to sew the center seam.
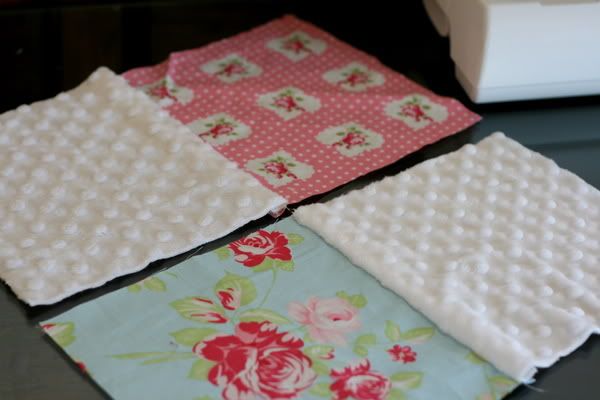
Being careful to match up the centers with seams laying open. Be sure to pin the seam allowances down so they don't get wonky when sewed into the new seam.
After it's sewn, flip it over and double check that the center forms a nice tight intersection. Now would be your chance to remove the seam and try again if it's off.
I'd feel really bad if that happened to you.
Next, iron seams open flat.
*I've had no problem ironing my minky, but since it's made out of polyester you'll want to use a cooler setting on your iron.
Then top-stitch close to the seam to keep them laying flat.
Repeat for the second side of the blanket.
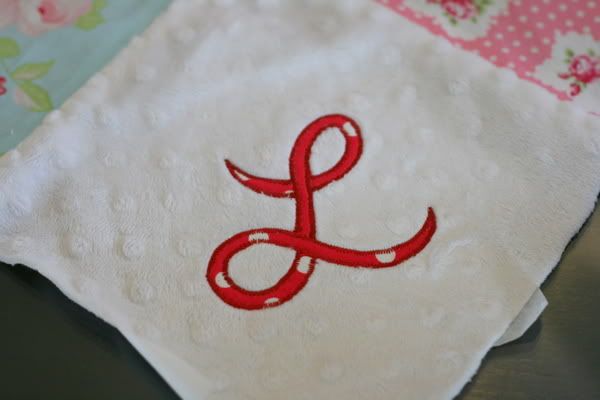
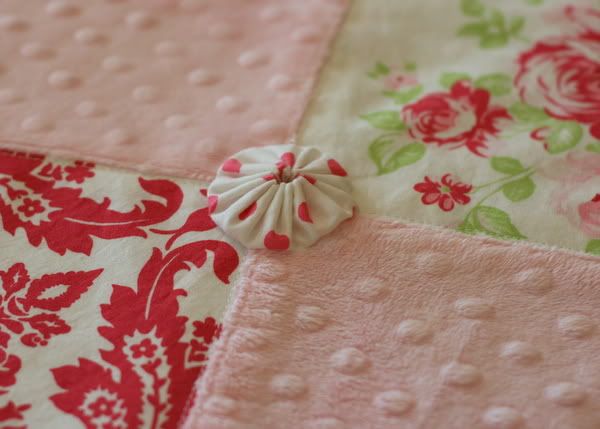
Step 3 {Embellish}
Now is the time to add any applique details you like. See my separate tutorial on how to applique.
Or add coordinating fabric yo-yo's. You can find yo-yo making tools at your local quit shop or craft store. Or you can just follow Heather's tutorial here.
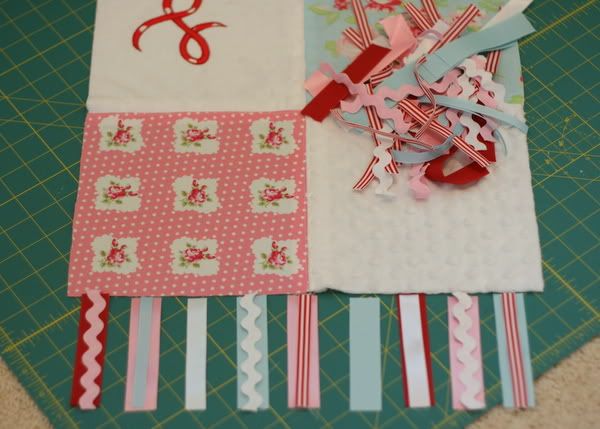
Step 4 {Add Ribbon Tabs}
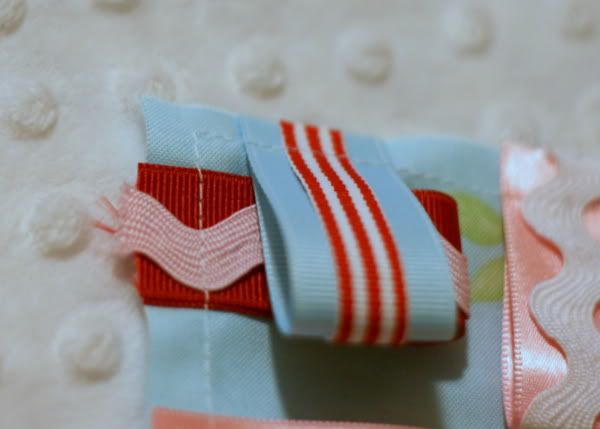
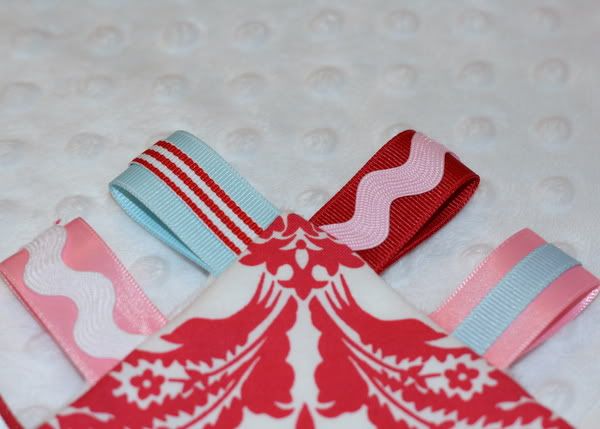
Start by playing around with the 4" lengths of ribbon and ric rac you've already cut out. Cut more as needed. I like to have the ribbon pattern repeat on every side, but you can certainly make yours random.
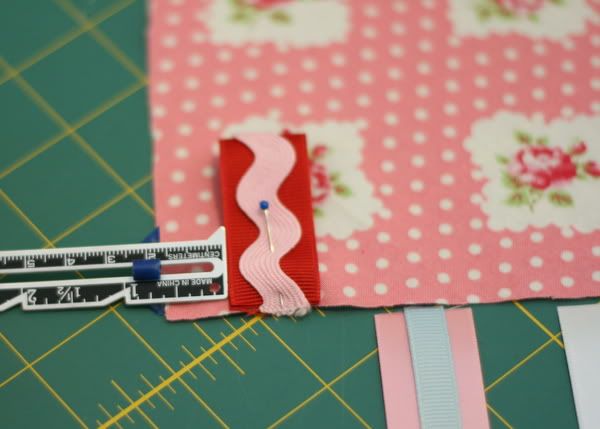
First pin the outside edges. Since you will be sewing with a 1/2" seam allowance, I like to place my outside pieces at 5/8" from the edge. This makes it less likely that the ribbons will be caught in the adjacent seam when sewing the top and bottom blanket pieces together.
Do this along all four sides of one layer. I like to flip one side under so I can see what the finished product will look like, to make sure I like the placement of colors.
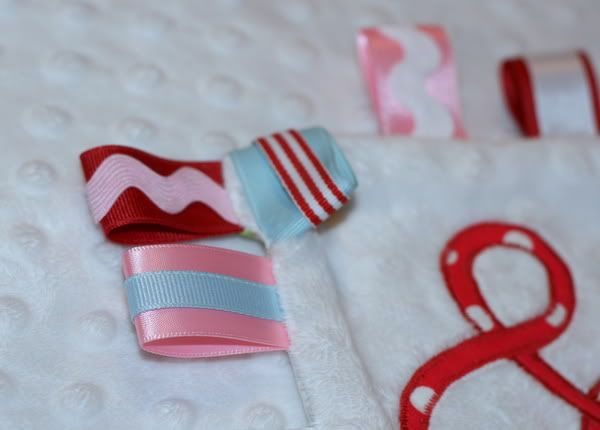
As needed, you can hold your ribbons down with two pins instead of one. But I like to have as few pin marks through the ribbons as possible to minimize the chance of snags or runs.
Sometimes they will want to lay crooked when there is only one pin in place. Just be sure to hold them down straight as you are sewing. If they get sewn on crooked now, that's how they will be on the finished blanket.
Now sew all around the edges to secure the ribbons, with a 3/8" seam. This is just so you can remove the pins before sewing the blanket top and bottom together. Remove all pins.
Step 5 {Sewing the blanket together}
Lay the other blanket square on top of the one you have sewn the ribbons to. Flip it over so the one with the ribbons, is now on top. I like to be able to see that 3/8" line I just sewed, on top as a guide.
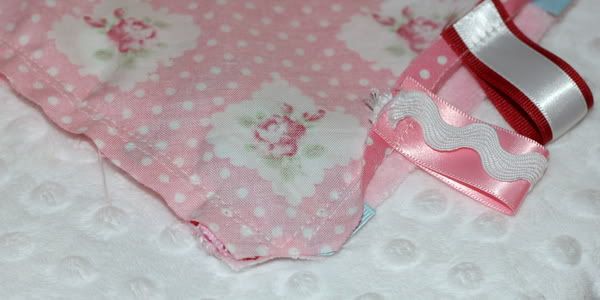
Sew along all four sides with a 1/2" seam allowance. Make sure to leave about a 3" wide opening to be able to turn it right side out.
After the top and bottom are sewn together, clip the corners so there will be less bulk when you turn it inside out. You can see the opening I left, in this photo.
Turn the blanket right side out. Pull on the tabs in the corner to pop the corners out. Hopefully none of the ribbons have gotten caught in an adjacent seem.
Oops! One got caught.
No big deal. Locate the stitches that are holding on to that run-away ribbon and use your
best friendseam ripper to cut it loose. If it's really bad (been there, done that), turn it inside out again and remove the whole seam, re-pin and start again.
No...that will not be fun.
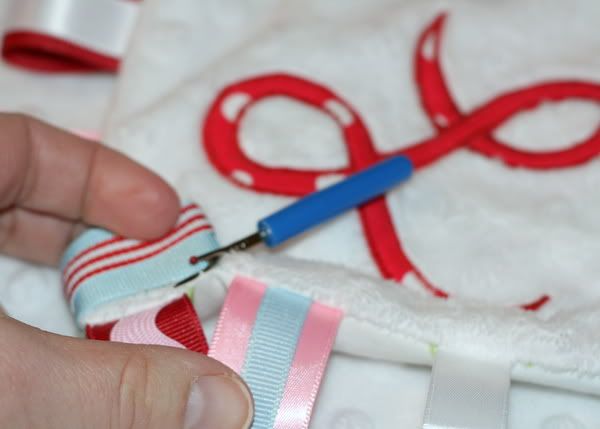
There, that's better. Don't worry about the little hole you just created. The final top-stitching will take care of it.
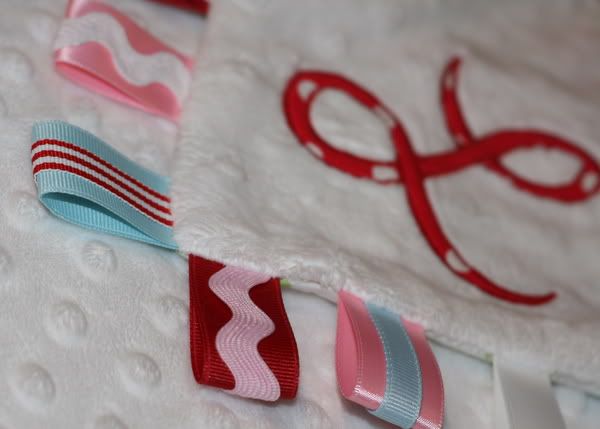
Now top-stitch the entire blanket along the ribbon edge and make some little stitches in the center to secure the top and bottom layers together. Then go find a baby to play peek-a-boo with.

Arrange your squares in a pattern that's pleasing to you. I like to have the minky squares opposite each other when the piece is finished, so no one section is thicker than another. So when you see minky on the top, the underside of that square will be fabric, and vice versa.
Pin two adjacent squares, right sides together. And sew with a 1/2" seam allowance. Repeat with the other three pairings. Whenever possible, I like to have the fabric pinned underneath the minky. Just so there will be less stretching of the minky as you sew it. Eventually you will have no choice to have it on the bottom, but you can just use extra pins to keep it in place at that point.
*Just read on this blog that you should ave the minky on the bottom and use a walking foot and a longer stitch length. I've had no problem doing it my way, but you may want to try this instead.

Lay out two of the four sets you have just sewn together and place them right sides together to sew the center seam.

Being careful to match up the centers with seams laying open. Be sure to pin the seam allowances down so they don't get wonky when sewed into the new seam.
Flat seam = nice
Wonky seam = not so nice
Wonky seam = not so nice

After it's sewn, flip it over and double check that the center forms a nice tight intersection. Now would be your chance to remove the seam and try again if it's off.
I'd feel really bad if that happened to you.

But I wouldn't be able to relate to that. Nope, not me. ;)

*I've had no problem ironing my minky, but since it's made out of polyester you'll want to use a cooler setting on your iron.

Then top-stitch close to the seam to keep them laying flat.

Repeat for the second side of the blanket.
Step 3 {Embellish}
Now is the time to add any applique details you like. See my separate tutorial on how to applique.

Or add coordinating fabric yo-yo's. You can find yo-yo making tools at your local quit shop or craft store. Or you can just follow Heather's tutorial here.

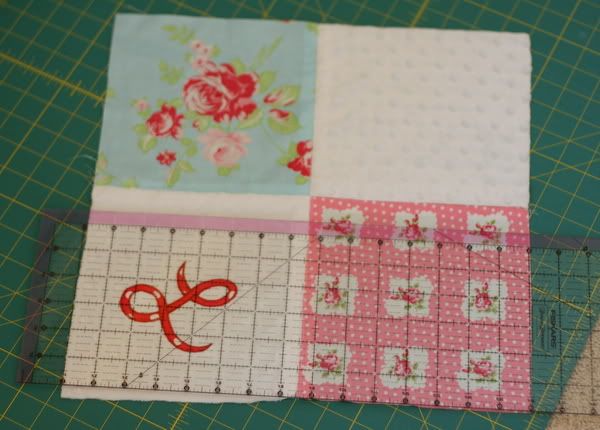
Before you are ready to add the ribbons, you'll want to make sure all the edges are squared up. There is bound to be some stretching of the minky, so don't be alarmed if there is a little bit to trim off.

Start by playing around with the 4" lengths of ribbon and ric rac you've already cut out. Cut more as needed. I like to have the ribbon pattern repeat on every side, but you can certainly make yours random.

First pin the outside edges. Since you will be sewing with a 1/2" seam allowance, I like to place my outside pieces at 5/8" from the edge. This makes it less likely that the ribbons will be caught in the adjacent seam when sewing the top and bottom blanket pieces together.

Next pin the ribbon in the middle. Whittle away that distance by continuing to pin in the center of the next opening so they are all equally apart.
Do this along all four sides of one layer. I like to flip one side under so I can see what the finished product will look like, to make sure I like the placement of colors.

As needed, you can hold your ribbons down with two pins instead of one. But I like to have as few pin marks through the ribbons as possible to minimize the chance of snags or runs.
Sometimes they will want to lay crooked when there is only one pin in place. Just be sure to hold them down straight as you are sewing. If they get sewn on crooked now, that's how they will be on the finished blanket.
Now sew all around the edges to secure the ribbons, with a 3/8" seam. This is just so you can remove the pins before sewing the blanket top and bottom together. Remove all pins.

Step 5 {Sewing the blanket together}
Lay the other blanket square on top of the one you have sewn the ribbons to. Flip it over so the one with the ribbons, is now on top. I like to be able to see that 3/8" line I just sewed, on top as a guide.

Sew along all four sides with a 1/2" seam allowance. Make sure to leave about a 3" wide opening to be able to turn it right side out.
After the top and bottom are sewn together, clip the corners so there will be less bulk when you turn it inside out. You can see the opening I left, in this photo.

Turn the blanket right side out. Pull on the tabs in the corner to pop the corners out. Hopefully none of the ribbons have gotten caught in an adjacent seem.

Oops! One got caught.

No big deal. Locate the stitches that are holding on to that run-away ribbon and use your
No...that will not be fun.

There, that's better. Don't worry about the little hole you just created. The final top-stitching will take care of it.

Now top-stitch the entire blanket along the ribbon edge and make some little stitches in the center to secure the top and bottom layers together. Then go find a baby to play peek-a-boo with.


Ribbon Love

Seriously cute!
My faves are the Hungry Caterpillar, Goodnight Moon and Peter Rabbit.
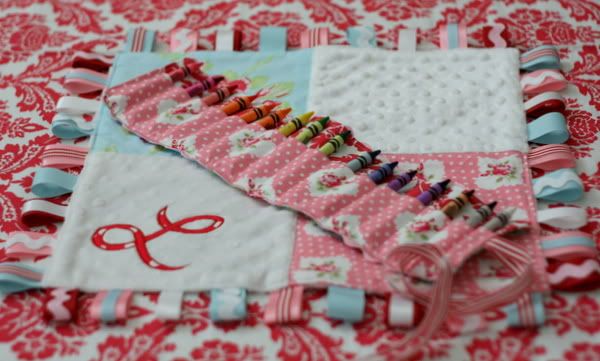
Now you've got the perfect baby gift.
Now you've got the perfect baby gift.

That's a wrap!