
Want to learn how to embroider by hand and make your own pattern?
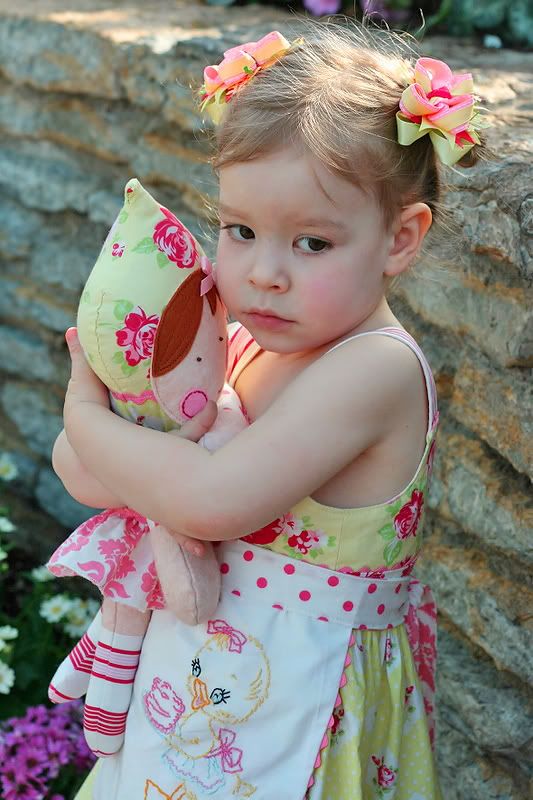
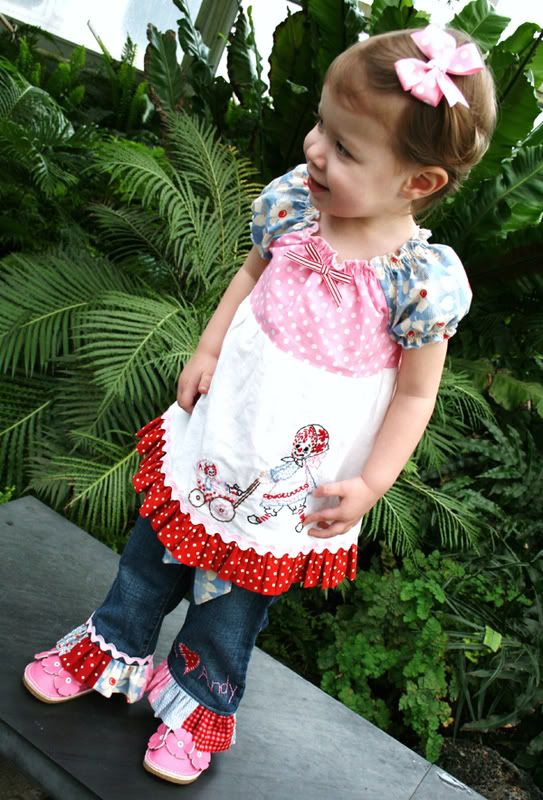
I personally love hand embroidery because I find it so relaxing. Sewing is fun too, but I have to sit at my sewing desk, away from my family to do it. With embroidery I can curl up on the couch and watch the kids play or watch a movie with my husband after the kids are tucked in bed. It's easy to travel with. You can fit it in a small bag (sewing machines, not so much) and pull it out to work on for even just 15 minute time slots. It's so easy to pick up where you left off. I hope you find it enjoyable too. Nothing does a better job of giving an outfit or a gift vintage flair, than hand embroidery.
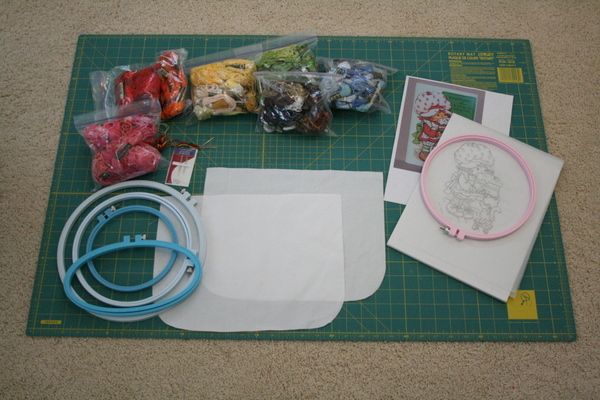
You'll need:
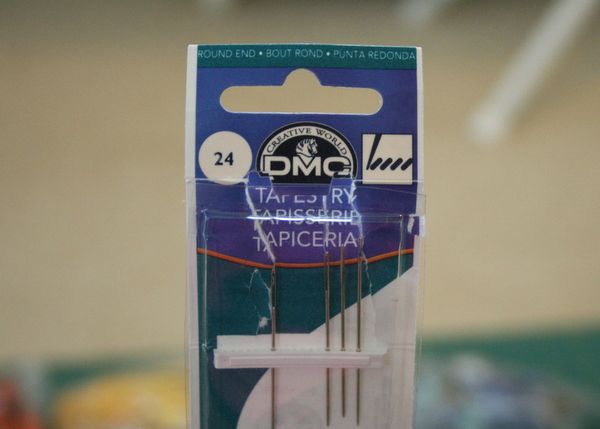
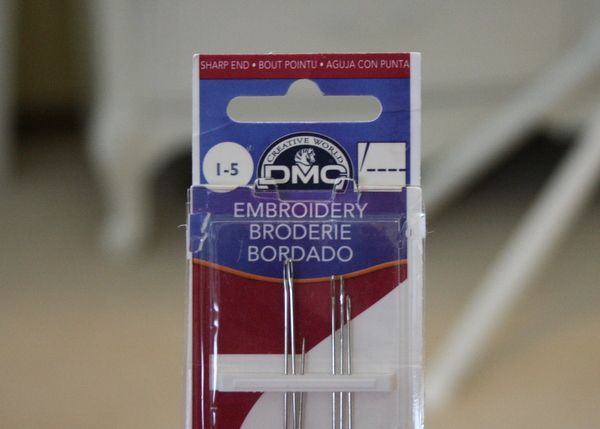
- Embroidery needles - Sharp tips for most fabrics, round tips for working on knits.
- Embroidery floss - DMC is my favorite.
- Embroidery hoop in an appropriate size for your design and fabric size.
- Fabric or garment to embroider on - A pillowcase or flour sack drying towel for the kitchen would both be great pieces to start on. I used Egyption cotton from JoAnn to make my child's apron.
- Pattern - Either a kit or tracing paper, heat transfer pencil and picture/drawing to make your own. Aunt Martha hot iron transfer kits can sometimes be found in big craft stores (embroidery isle) or more easily on eBay (this is where I have found most of my kits). You can also find some unique pdf style patterns on Etsy, you will need tracing paper for these. ComfortStitching has some of my favorites. Check out her Little Red Riding Hood design. And here is another site that sells patterns from different designers. Here, I will show you how to make your own pattern from a picture and how to iron the design on.
- An arsenal of stitches. Embroiderers Guild has a great *free* on-line guide for you.
- Clean hands!
Step 1 {Choose a Design}
You'll want to either buy a kit, like Aunt Martha's or a pdf pattern on Etsy, or draw or find a picture of your own. If you buy a kit, then just follow the directions on the envelope. The pattern is already printed onto paper. All you need to do is iron it on. You will read about this in Step 3. If you buy a pdf style pattern or choose to make your own drawing, just follow along with me.
Here is the photo I used.

*Please note that Strawberry Shortcake is a trademarked icon, just like Hello Kitty, Mickey Mouse, or the Disney princesses, etc... It is illegal to reproduce their images for profit. The apron I made here was for a gift so that is just fine since it's considered "personal use."
I printed it in the size I needed for the apron. You can easily copy/paste a photo into a Word doc. There you can drag the corners in or out to the desired size, then print.
Step 2 {Tracing}
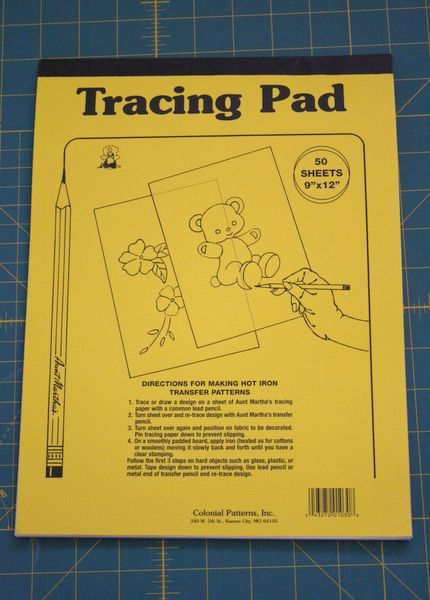
Next grab your pad of tracing paper...
...a regular pencil and your Heat Transfer Pencil. You can find these at JoAnn. Make sure you sharpen your pencil very sharp and do so often.
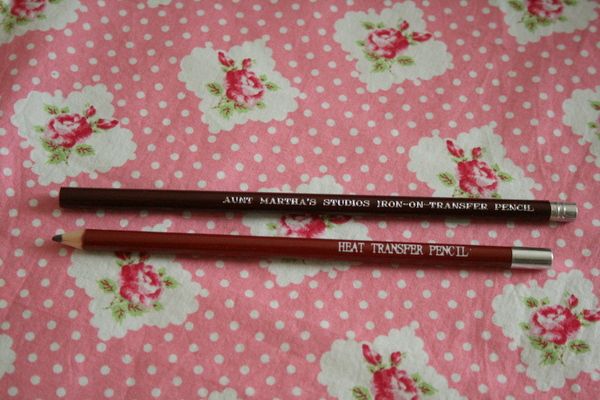
For this part you will use a regular pencil, not the heat transfer pencil. Because this is the side that your iron will directly touch and the heat pencil markings would melt onto your hot iron.
Go ahead and trace your design, the way you want it to look. Since my photo didn't start out as an outline, I paid attention to not include details I wouldn't be stitching. Like the polka dots on her red dress and the barely noticeable ones in white on her hat or the kitty. Polka dots are sure fun, but in this instance they would have looked too busy.
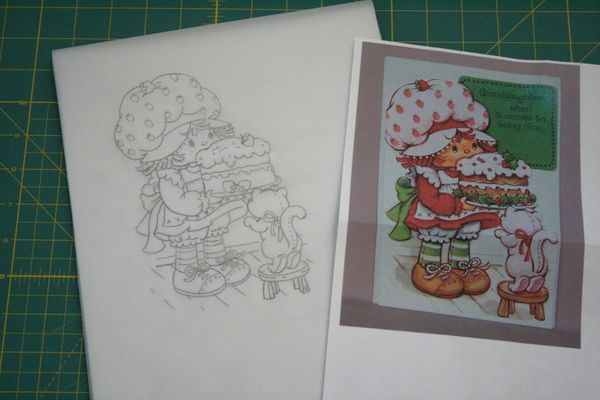
I also didn't include the greeting and I didn't want the cake to be decorated for Christmas. This will be used for a Birthday Girl at her 3rd Birthday Party.
Now, flip your paper over and trace the design you just drew, onto the backside of your paper. This time you will use your transfer pencil as this is the side that will be ironed onto your project. It's the reverse of your image. If you didn't care which direction your photo was placed, you could skip drawing it on the reverse side and just use your transfer pencil for your original tracing. Your ironed image will be the opposite of what you drew. Just make sure you don't do that if there are any letters/numbers involved, or they will be backwards.
Step 3 {Iron your pattern on}
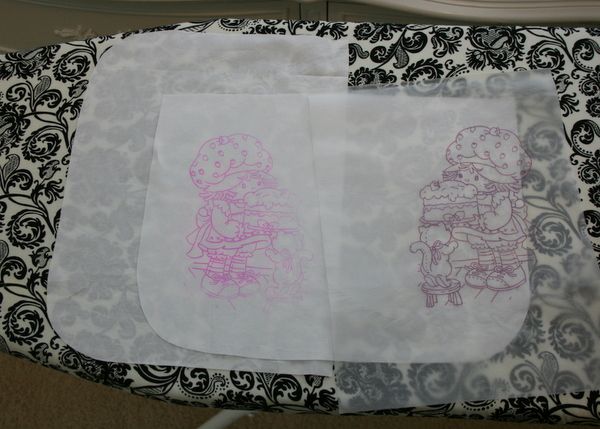
Now that you've got your drawing traced with the heat transfer pencil, you are ready to iron it on. Lay your paper down on the fabric in the place you want it. I measured to be sure it was 1.5" from the left and bottom edges, to allow for my seam allowance and a visually pleasing placement. They say to pin the paper to your fabric so it doesn't slide around, but I don't like trying to iron around the pins.
Lay your hot iron (I use cotton setting with NO steam) on the design. Hold for about 8 seconds and gently slide it to cover the rest of the design. Do this while holding the paper in place, tightly. While I'm ironing the second spot I gently lift up a corner of where I started to make sure it has transferred. If it's not as dark as you'd like, you can slide back to that spot again and iron another 5 seconds or so. It might be best to do a test run on a scrap of fabric for your first try.
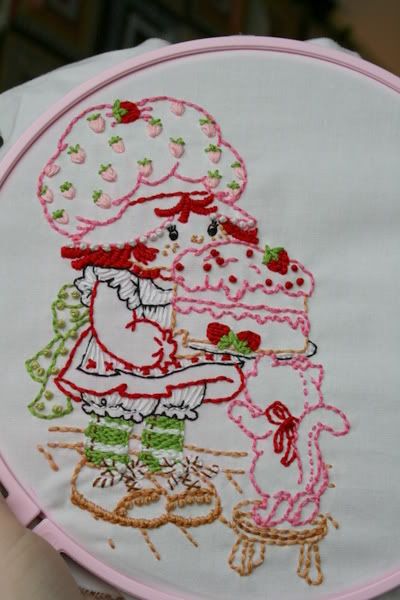
Here is my apron piece with the design ironed on to it. I have the lining of the apron behind it just so you can see the design, since my ironing board cover is awfully dark. You'll notice that the corner with the kitty didn't get as dark. I decided it was dark enough since I could still see the lines. And actually, it probably would have been better if it was all that light.
Step 4 {Hoop}
You are now ready to add your hoop around the design and begin stitching. The hoop is very important for even stitches. It holds your fabric taut and creates a nice flat surface to work with. Without one, it would be too easy to pull some stitches tighter than others, thus distorting your final product.
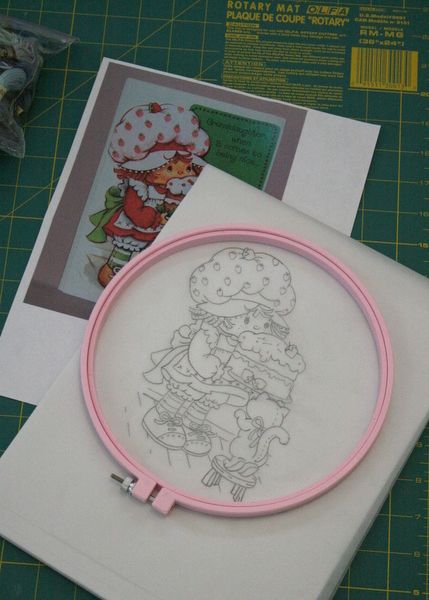
Start by choosing a hoop that will hold all of your design and still fit on your fabric. My hoop size actually cuts off a bit of the wood floor section so I will move the hoop when I get to that portion. But if I had chosen a larger hoop, it would have been off the edge of my fabric, and wouldn't have been able to hold all the fabric taut. You'll also want to untighten the hoop when you aren't working on the project. This will help make it easier to iron out the wrinkles it creates.
I like to have the screw on the top of the fabric. The directions for the hoop say to put the other piece on the top, but then the screw would be on the bottom and I always manage to get my threads snagged on it since I'm not looking at that side. Sometimes it's OK to do things backwards if they make more sense for you.
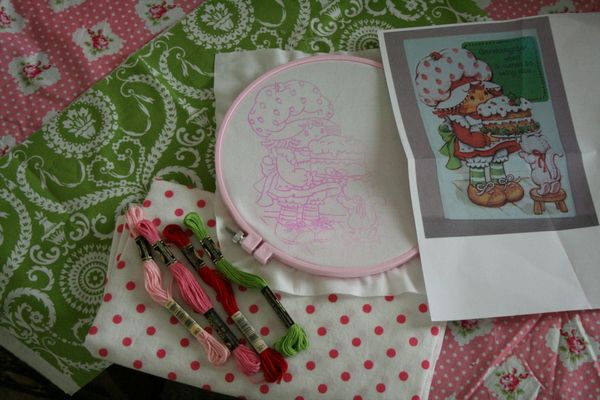
Step 5 {Floss & Needles}
You'll need to buy sharp point needles when working with any fabric that isn't a knit. Round tips are for working with knits so you don't cut through the actual fabric, leaving a whole. Here is what I buy. Don't ask me what those numbers mean. I was just looking for a size that had the needle eye big enough to not annoy me to death when I thread it.
Embroidery thread is called Floss. It's a thick thread, made up a six strands. Pick your colors and get ready to thread your needle. I usually pull out about 4 feet of length or longer. I don't like having to re-thread my needle, so for me a longer piece is better. You might find you prefer working with shorter lengths because you will be less likely to get it in knots while stitching.
Separate the 6 threads and pull off a group of three. This is completely up to you, but it's how I like to do it. Since my thread will be knotted at the end, it will be twice this thickness when on my needle. I use all six strands when stitching words, and I will use just one strand when making tiny outlines like you'll see on her shoelaces later.
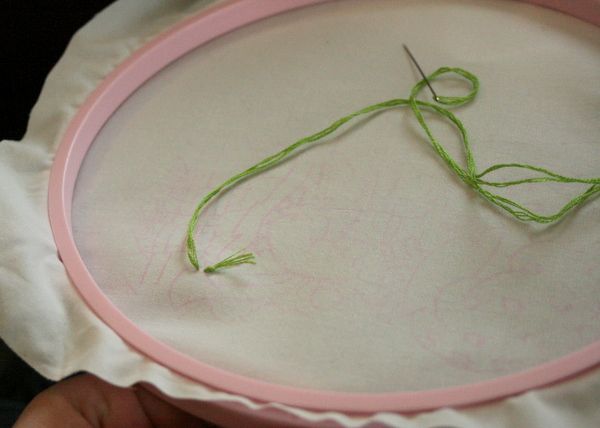
Now thread it onto your needle halfway and even up the ends and tie a knot.
For embroidery that won't be worn and washed, you actually never tie a knot. You leave a tail when making your first stitch and then make sure that later stitches cover it on the backside and then you trim the excess. You end you stitches by weaving your needle under other stitches on the backside and then trim the excess. But, since this apron will be worn and washed, it's imperative that you knot at both the beginning and end of each thread, or it may wiggle it's way out with wear.
Step 6 {Start Stitchin'}
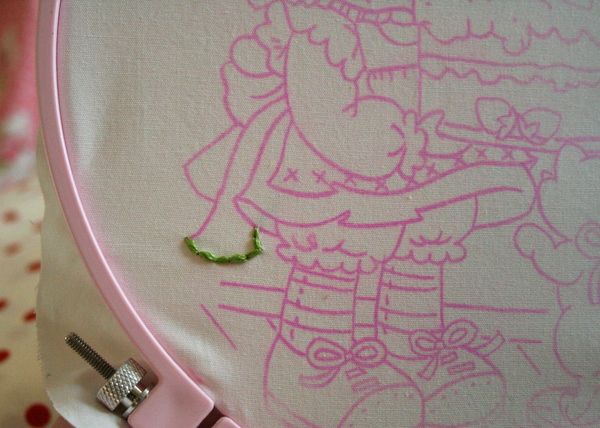
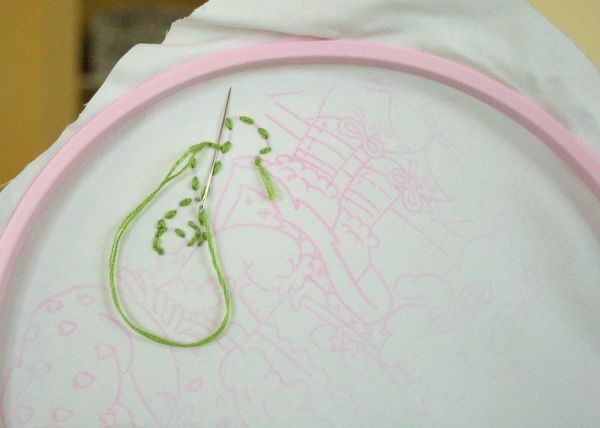
Now you are ready to stitch. If you can trace, then you will have no problem tracing with thread. It's really simple. Look at your design and decide what colors you want each line to be. Make your first stitch by poking your needle up from the bottom and inserting it back down, about 1/8" away from where it came up at.
Let's talk stitch length and tension for a minute. Just like on your sewing machine, you need to pay attention to both of these. You want to have an even tension so that the fabric isn't gathered up in your stitches. You want the fabric to lay flat without puckers anywhere. You also want your stitch lengths to be as even as possible. You'll need to do this by eying it, but it will come with practice. I like my stitches to be about 1/8" in length. But be careful to note that they may need to be shorter as you follow a line that curves. You don't want your stitch line not to cover your pattern line, so shorter stitches along curves will allow you to follow the curve more closely.
Start in a corner, not the middle of each section. That way you don't have to backtrack and waste any of your floss in long stretches on the backside. I'm all about conservation, in fact I look at a section and figure out how I can cover it with as few stitches as possible. I think "if I go up, this way, will I be able to come back down this side to reach that point over there?"
Here is what your backside will look like.
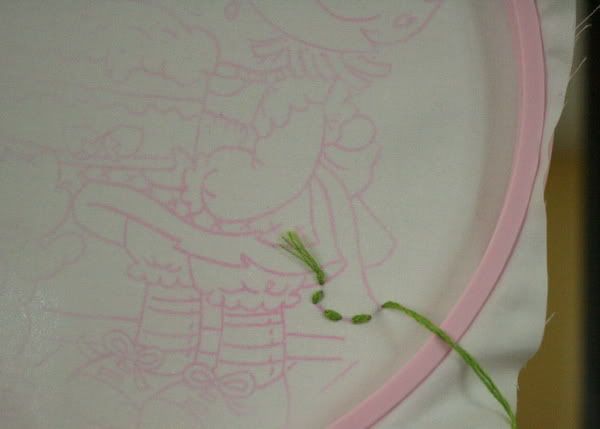
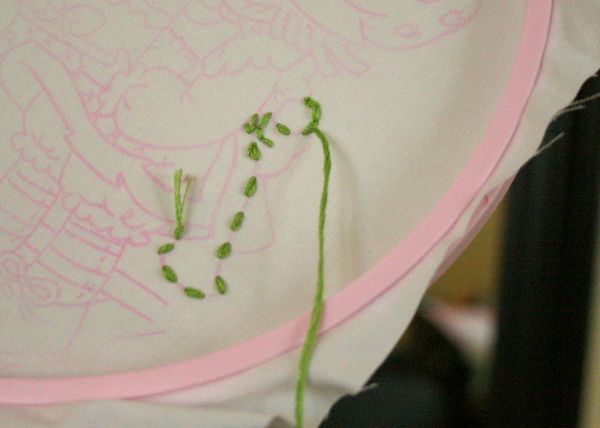
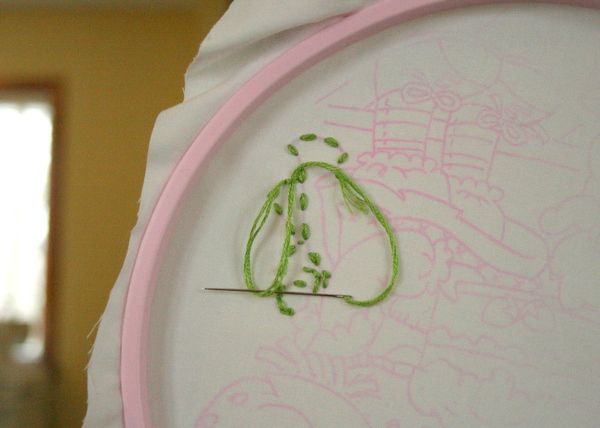
In the next photo, you'll see that I started skipping stitches. This is because if I had gone all the way up to her sleeve I would have a big "jump" on the backside. So instead, I skipped every other stitch so I could fill them in on my way back down. Make sense?

When you do that, the backside will look like every stitch is filled in, instead of every other one like the last photo of the backside.
Step 7 {Tying Off Stitches}
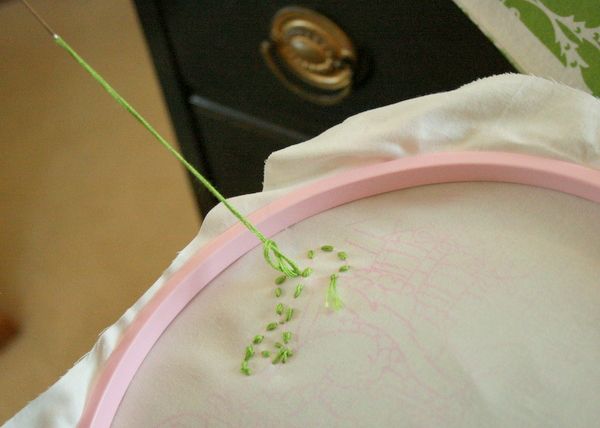
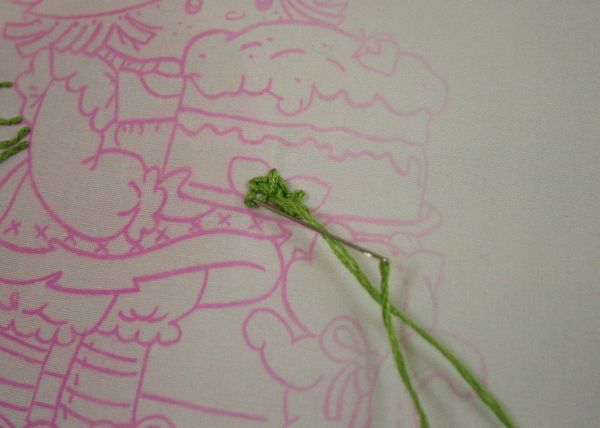
Once you are finished filling in a section, or your thread becomes too short to keep working with, tie it off. On the backside, place your needle under the stitch next to your last stitch.
Gently pull it until you have enough thread to go through the loop you just made.
Pull the thread tightly through, creating a knot. I repeat this so I have two knots.
Next, I slide the needle under some adjacent stitches, to anchor the tail.
Then trim, for a neat looking backside. I later trimmed the tail from my beginning knot too.
Step 8 {Fancy Stitchin'}
I mentioned earlier that the Embroiderers Guild has an easy-to-use stitch guide. It's a great place to learn how to make a french knot, chain stitch, bullion knot, seed stitch or satin stitch.
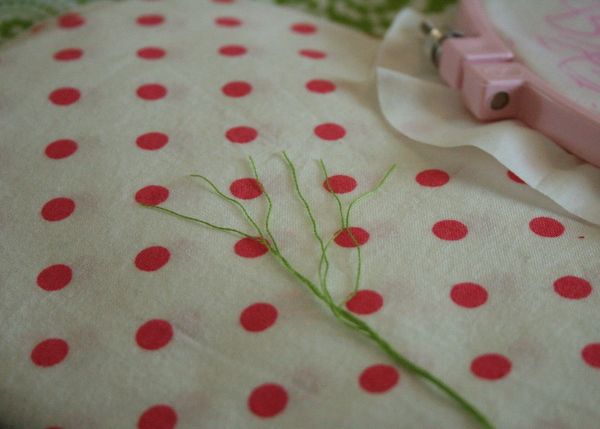
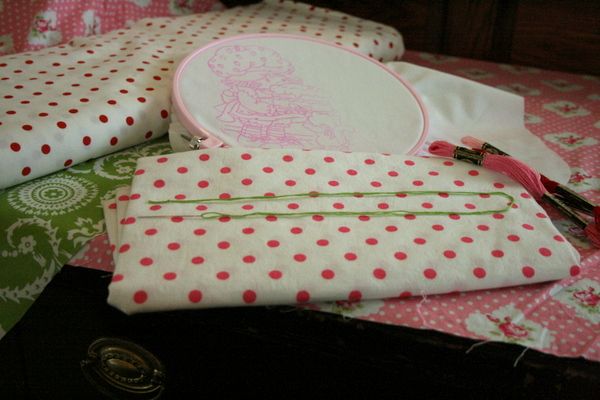
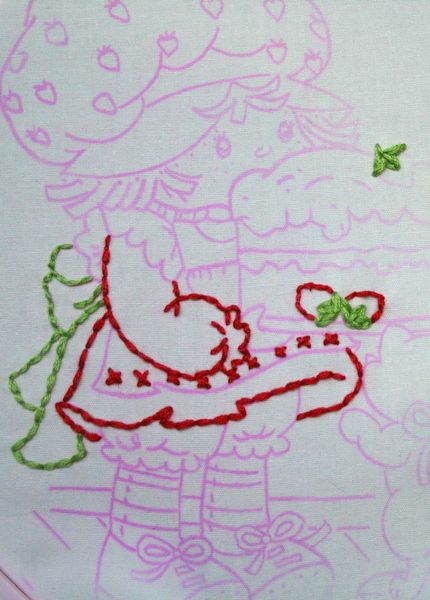
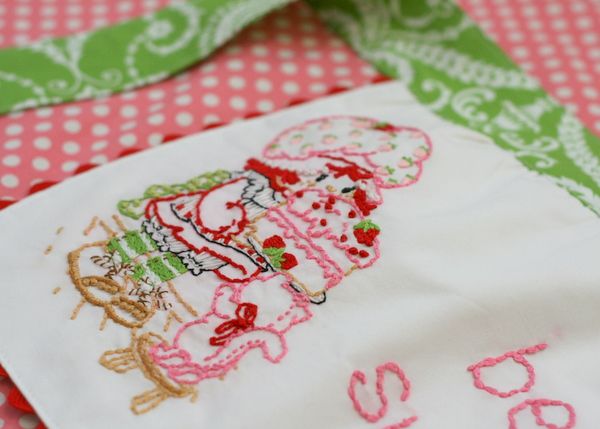
Here are some of the more special things I did with this design.
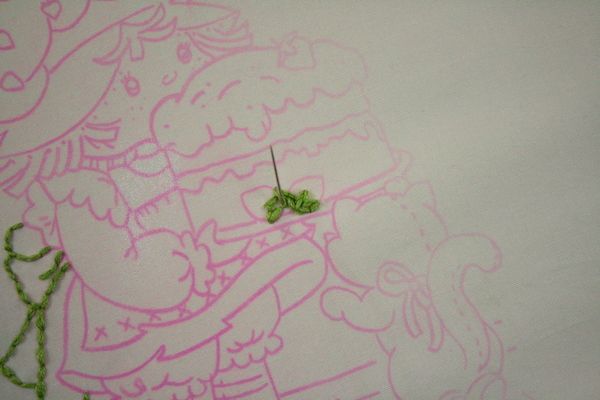
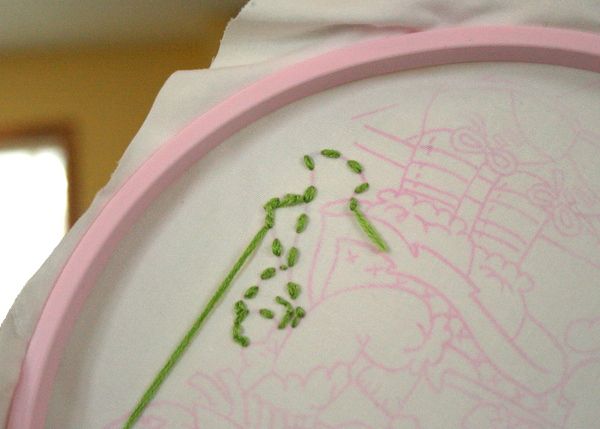
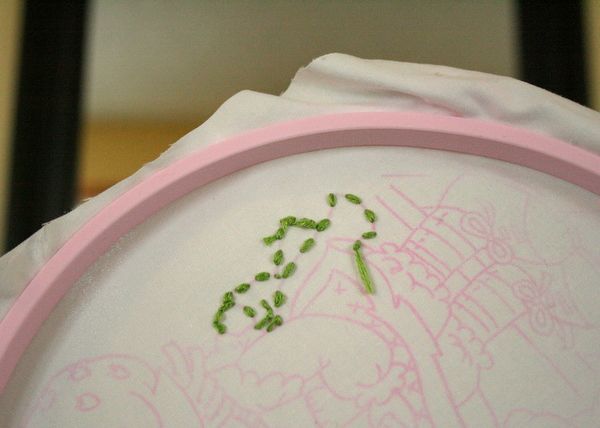
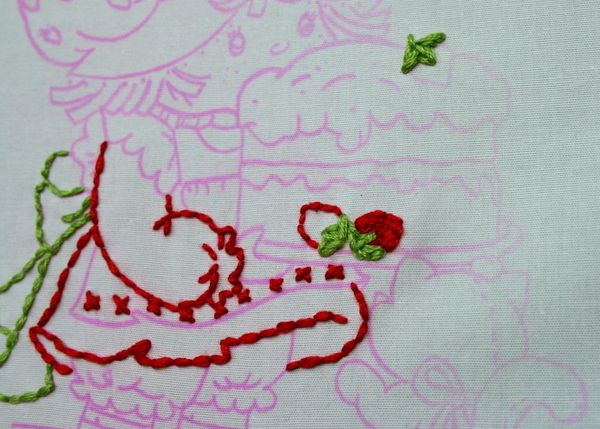
Rather than just outline the strawberry stems, I also filled them in with a final stitch that extends from the top to the bottom of each leaf (inside the outline).
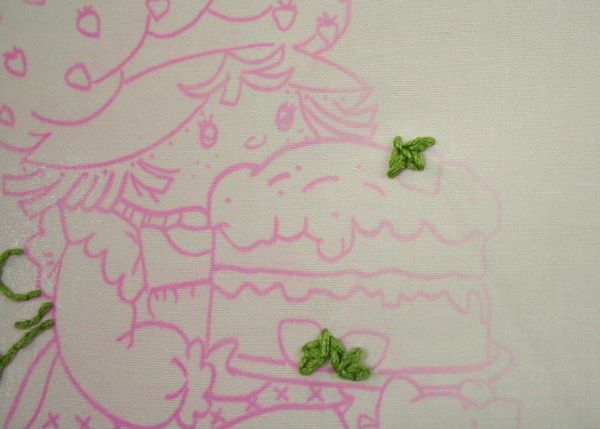
And for the berries, I outlined and then filled them in with staggered stitches.
I enjoy just making things up as I go along.
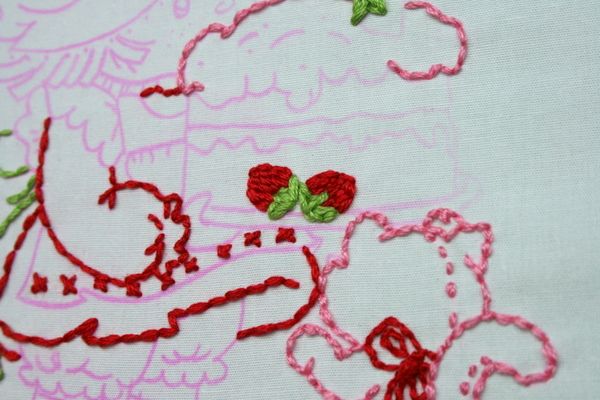
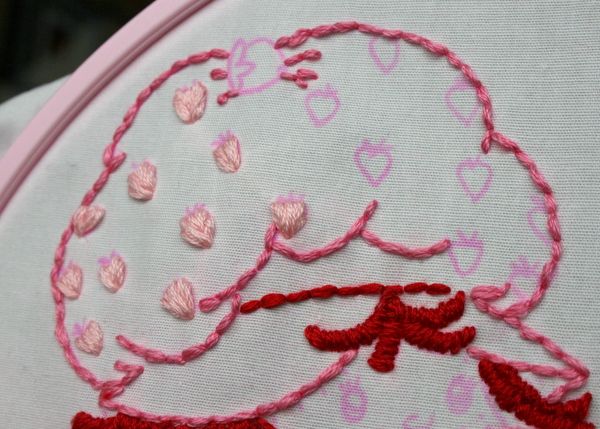
For the berries on her hat, I stacked the stitches to make them looked raised and add dimension to them.
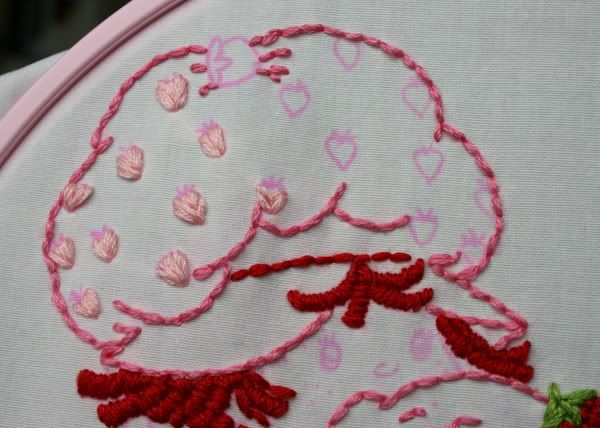
Look at the berry in the middle. I started outlining the sides and filling in as I worked my way to the top. Then each stitch that came through along the top line, ended at the bottom point. All going in to the same hole.
This is also a good close-up of the satin stitching I used for her yarn-looking hair. I realized that it would just look like a stringy mess if I had only outlined it. That's part of the challenge of taking a colored in photo and turning it into a vintage looking outline.
I also decided that after outlining all the white portions in black, that it wasn't obvious that those were white. At least it wasn't obvious to my husband. :) So I decided to make white stripes on her pinafore. Who's to say she's not wearing a tonal white striped fabric? Not me!
And for her socks, I wanted the stripes to stand out and after only outlining them, I realized tat they were getting lost in the over all picture. So I filled them in the same way I did the berries. The little girl who is going to wear this apron is pairing it with an awesome pair of green striped knit pants. So the tights were an important part of this piece and they needed to stand out.
For her shoelaces, I outlined them in white because I had to cover up all those pencil lines. Then I used one strand of brown to make it look like more like yarn. If I had it to do over again, I would probably not have drawn on the laces with the pencil, but just free-hand stitched the bows with brown floss. You know what they say about hindsight...
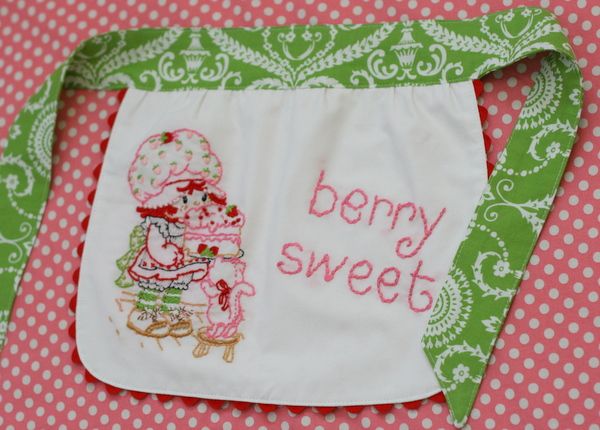
Step 9 {Say Something}
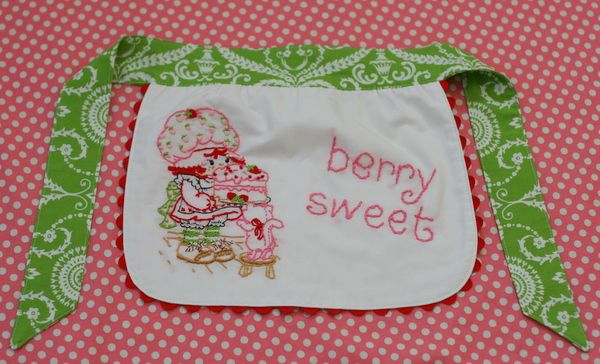
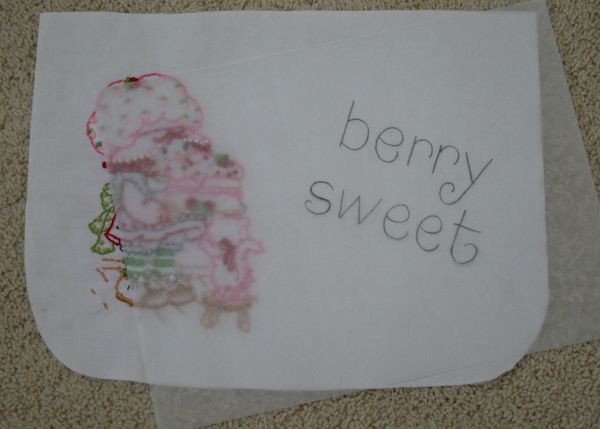
Next, I wanted to stitch the words "berry sweet' on the apron. But I wanted to do it using the Strawberry Shortcake font. I had no idea what that was called, but a google search led to me to this link which was just what I needed. After trying to copy it by hand (not so pretty), I turned to a more exact method. I copy/pasted it to my paint program and cropped the other words off. Then I pasted it into a word doc and made it larger by pulling at the corners. Then printed it out and re-drew the letters with a marker.
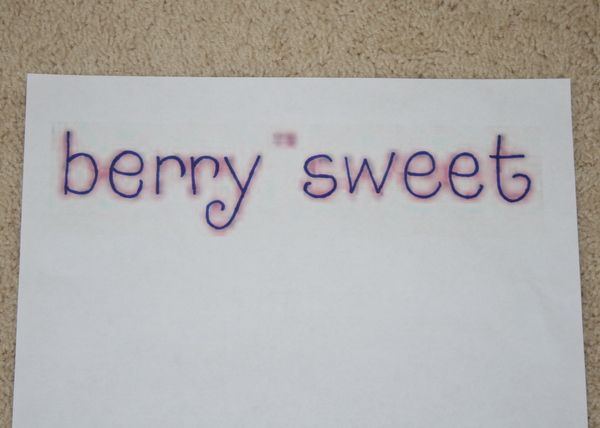
Then I traced the words onto tracing paper and laid it on the apron to make sure I liked the layout. Then I followed Step 2, above, and ironed the pattern on.
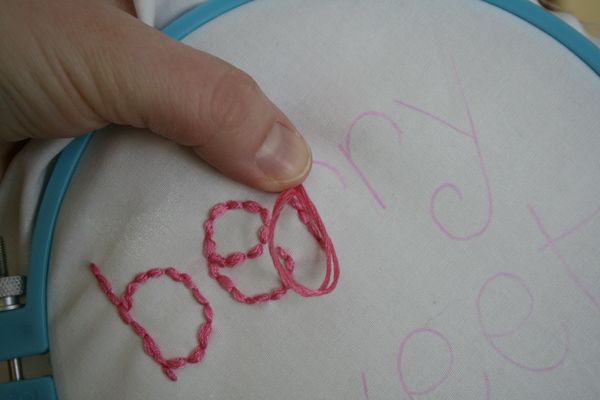
And got busy stitching. I used all six strands, so when it was folded in half on my needle, it was actually 12 strands gong though each spot, several times. I like the chunkier look for all six strands, for words. It gives them more presence.
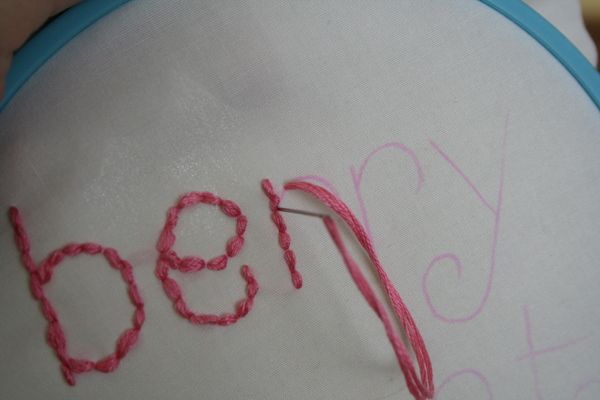
In the above photo, I was about to pull the thread down into a whole that already had 24 strands in it. It's hard to do that, so I placed my thumb on top of where the thread had just come from. This anchored it, which allowed me to pull as hard as I needed to, to get the eye of the needle through.
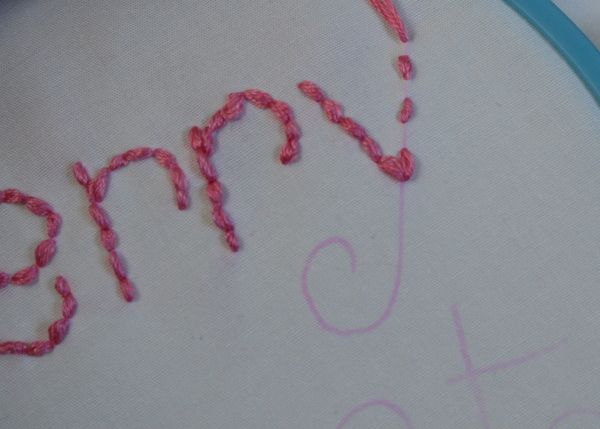
For the "y" below, I did a running stitch and then backtracked down the "y" so I could finish it off.
Step 10 {Finish 'er up!}The stitching is done, now all that's left is to sew the apron together. Follow my apron tutorial {here}.
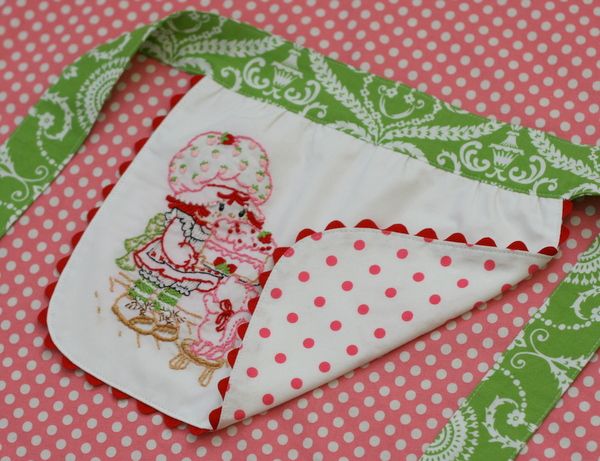
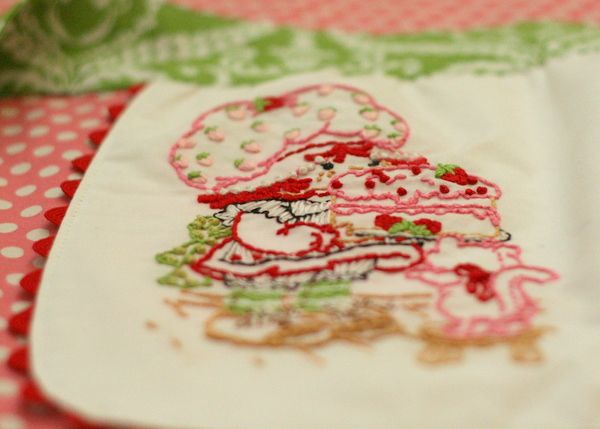
Need some inspiration?
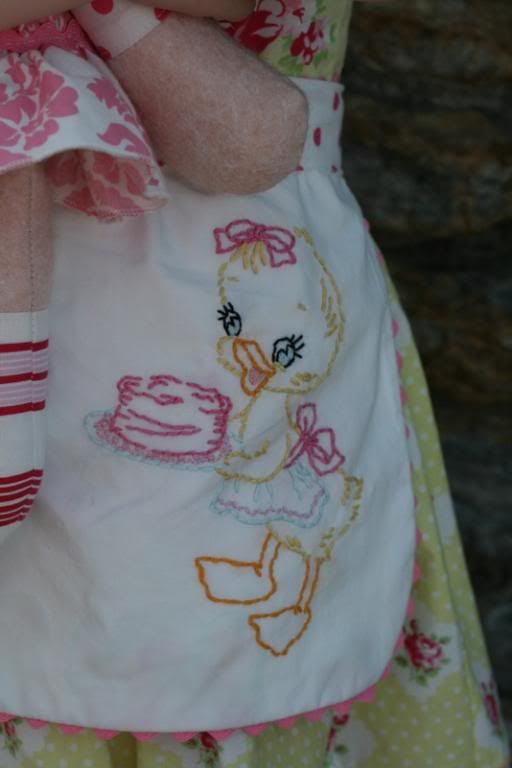
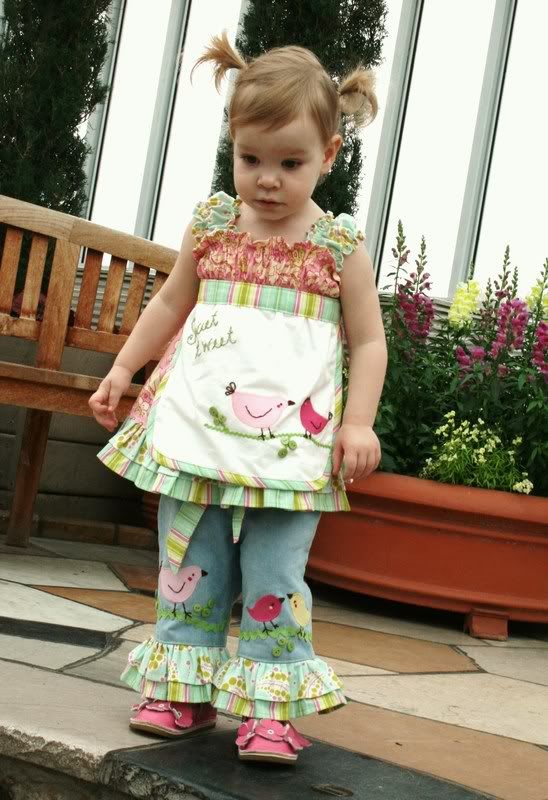
Here I combined applique and embroidery.


Next, I wanted to stitch the words "berry sweet' on the apron. But I wanted to do it using the Strawberry Shortcake font. I had no idea what that was called, but a google search led to me to this link which was just what I needed. After trying to copy it by hand (not so pretty), I turned to a more exact method. I copy/pasted it to my paint program and cropped the other words off. Then I pasted it into a word doc and made it larger by pulling at the corners. Then printed it out and re-drew the letters with a marker.
Then I traced the words onto tracing paper and laid it on the apron to make sure I liked the layout. Then I followed Step 2, above, and ironed the pattern on.
And got busy stitching. I used all six strands, so when it was folded in half on my needle, it was actually 12 strands gong though each spot, several times. I like the chunkier look for all six strands, for words. It gives them more presence.
In the above photo, I was about to pull the thread down into a whole that already had 24 strands in it. It's hard to do that, so I placed my thumb on top of where the thread had just come from. This anchored it, which allowed me to pull as hard as I needed to, to get the eye of the needle through.
For the "y" below, I did a running stitch and then backtracked down the "y" so I could finish it off.
Step 10 {Finish 'er up!}The stitching is done, now all that's left is to sew the apron together. Follow my apron tutorial {here}.
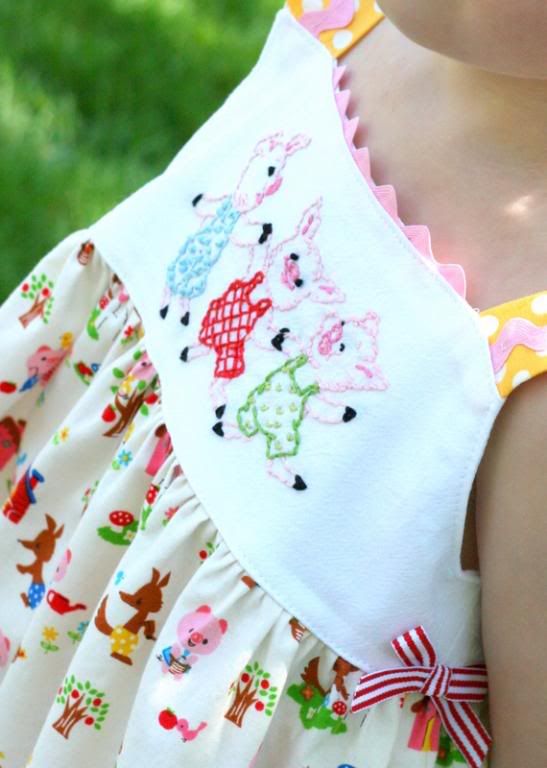
Need some inspiration?
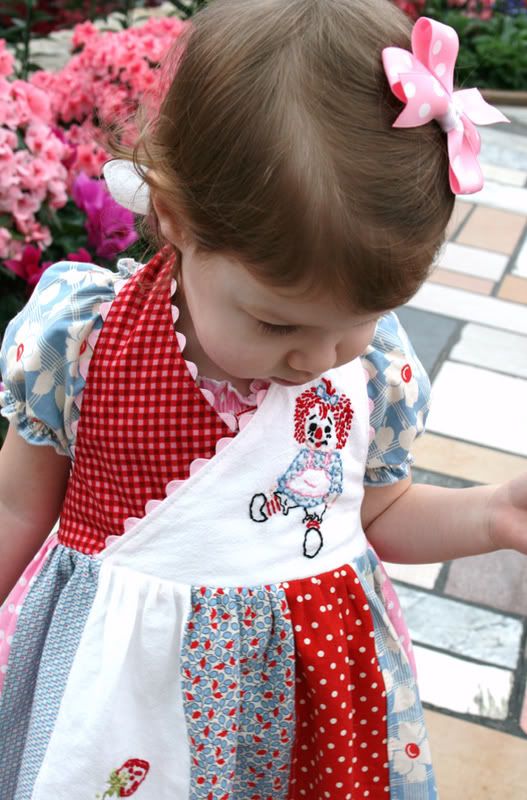
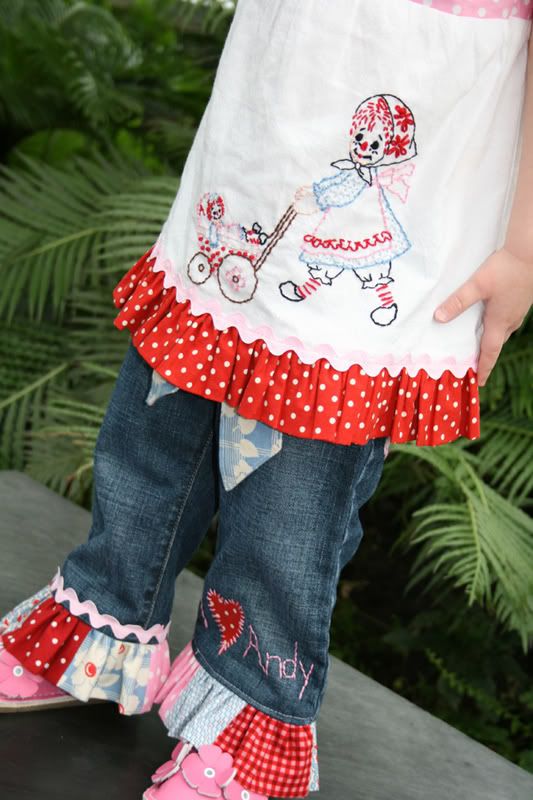
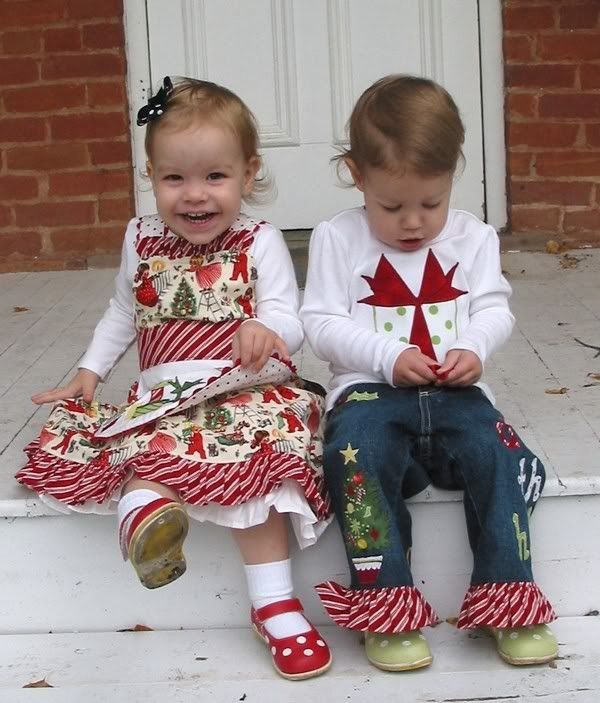
Here are some of my past designs with hand embroidery.
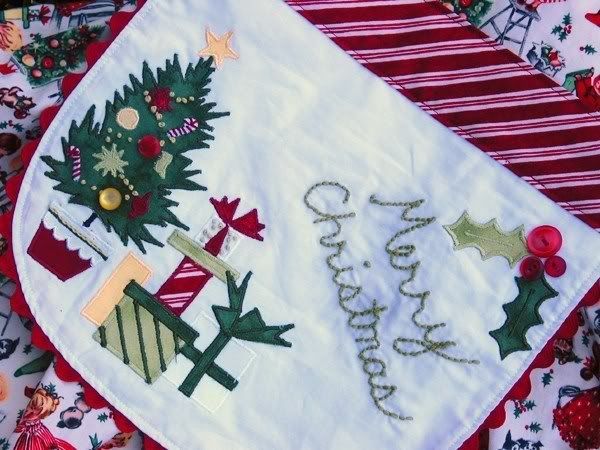
Here I combined applique and embroidery.


37 comments:
HOLY SMOKES to you have a lot of patience girl! Great tutorial! I have never been a great hand stitcher and would love to get better at it!! NICE WORK!!
Jenn
You make it look so easy! I would love to give it a try but am pretty sure it would not be wear worthy :)
I love this and read every word of your instructions with great interest. I'm bookmarking and will definitely be applying your tutorial to something. Maybe the bodice of a dress? Hmmm...I'm thinking!
~ Sarah
Angel, this is AMAZING! The amount of detail that goes into making a hand embroidered piece is just a reflection of the love put into it. This is the sweetest birthday gift ever! Grace is going to love her apron and I'm going to love seeing it on her! {You should have seen how excited she got just looking at the SS picture from your post a few days ago!} Now...to make a dress fitting of such an exquisite apron - yup, I'm feeling the pressure!
Thank you so much for sharing all these wonderful tutorials. I've learned so much and want to try it ALL! And YES, I would love to see the child apron tute, as well!!
By the way, your sidebar is looking so pretty with all these color coordinated tutorials :)
love it- I have always known how to do the stitching but never thought you could take it from a drawing I LOVE IT! Your work is always perfect inside and out! Perfect project to sit curled up on the couch love that part the best :)
Thanks for the tutorial! YOu did a beautiful job and love all the rest of your examples. So cute!
Another fabulous tutorial, Angel! I've done many stitcheries and framed them or made them into pillows. BUt I've never emdroidered clothing. Such a neat idea! And I learned a few tricks too.
I'd love an apron tutorial...
I'm coming out of the stalker mode to comment. Beautiful work! My mom taught my sisters and I to embroider when we were little. Thanks for a tutorial that inspires me to pick it up again so I can teach my daughters. I love the apron and would definitely enjoy a tutorial on it :)
I'm so glad everyone is enjoying these tutorials and actually learning something from them. I'll put the apron tute together soon.
Amber, I think you'll find it's easier than you think. You'll be addicted in no time.
Sarah, I can't wait to see what you think up. Your blog is so cute and you are so creative!
Jessica, yep, it's definitely a labor of love. ;) I'm so excited to see it on her!
Colleen, I can't even tell you how many cross-stitch kits I've started and never finished. I think not having to follow someone else's pattern to a tee is what I like best about this type. I get to make it up as I go along. That's my kind of crafting! LOL
Jenn, Kori & Stacy, that's so much ladies!
"Colleen, I can't even tell you how many cross-stitch kits I've started and never finished. I think not having to follow someone else's pattern to a tee is what I like best about this type. I get to make it up as I go along. That's my kind of crafting! LOL"
I agree! Actual cross-stitch bores me to death, but let me draw or trace a pattern and I'm good to go! I find it creative and relaxing. Looking forward to your next installment...
I am SOOOOOOO impressed. Everything you make is gorgeous!!! Just love those little outfits and creations. LOVE THEM ALL!!
Blessings-
Amanda
The tutorial is great, clear and precious and your works are really gorgeous. I love the way you match the colors and it's very nicethe fact that you like to share. Thank you , even because looking at your pictures I feel confident I can do it too. I'm your follower, now, and will keep on visiting your blog daily! Happy stitching, Clara.
Your work is so GORGEOUS! I too love hand embroidery. I enjoyed your step-by-step instruction & awesome pictures. I need to step outside my stitch comfort zone & try some new stitches.
Wow! That is really cool. I've always wanted to try embroidery and I think this is just the push I need. I'd love to see a tute on making the apron.
Love it! I have a picture my son drew that I was wanting to embroider onto a t-shirt. This is exactly what I needed to see. Thanks so much!
Amanda
I totally love this... just for the eye candy!
oh this is wonderful! thank you so much. i will definitely refer to it for future embroidery projects.
I love this tutorial and your projects I linked to it on an embroidery project I did
here is my post that i linked to you- sorry forgot to put it in my comment http://jameehomemaker.blogspot.com/2010/04/dressing-up-your-dress.html
I just stumbled across your blog from Jamee's Homemaker blog. Love the apron! Even though my daughter doesn't need an apron- she already has one- she might have to have another! ;)
mommyoftwo247.blogspot.com
Thank you for this!! I have never done embroidery in my life, but I want to make my boys some "Sir Mickey" t-shirts for a surprise outing to mideaval times during our disneyland trip this fall. This is just what I needed to get started!
I too thank you for this! I have been considering purchasing an embroidering machine so I can cloth my kids in the same cute high quality clothing their peers wear, with out that EXTRA cost that those clothes actually cost! This is PERFECT for me!
Wonderful tutorial...
keep going...
Looking for this Three Little Pig pattern ... any help on where I could find it ??
Thank you
My grandmother was an excellent at embroidery, and I always wanted to learn how, but chose to crochet instead. Now that I'm great at that, I want to learn how to embroider! I really appreciate this tutorial with the added sites to visit! You can bet I will be coming back to your site!! Thanks for taking the time to make this tutorial!
Hello,that was really darling. Most of all thank you for your time in sharing on how to do this. I am the Ceo of a Nonprofit The Caring Handz of Texas.
It is costly to pay to have shirts designed.
Now I can do them myself,and spend more on needy people.
A BIG THANK YOU! :)
That is SOOOOOO good! Omg it's wonderful! I have just started to embroider, like I have only done 2 things but man am I hooked and you showed me the magic of those heat transfer penils! I would of never known. Thanks!
I am so impressed with your work. It's really inspirational.
Wow! Its really amazing!
Thanks for Sharing!
Wow, that is fantastic! And it makes an amazing idea for embroidered gifts for my nieces! Thanks for walking us through your hard work!
Love your work! (Er, fun!!!). I've just started embroidering recently and have almost finished my second pillowcase. I have a lot of tied off knots from French knots. I'm wondering if the threads are going to pull apart when washed. I thought about ironing a piece of fusion (is that the right word?) on the back to keep them secure. Or, even putting a dab of super glue on each knot. Any suggestions? Thanks!!!
Dixie, if your french knots are tied off on the back of your work I think they should be fine. I always wash on gentle or by hand anything with embroidery and then lay flat or hang to dry. This will save the piece longer as well. I use plenty of knots when embroidering on clothing. I don't think you need to mess with glue or fusi-knit.
Great tutorial and stunning work! The recipients of your gifts are very lucky. I am inspired to give hand embroidery a try now. Thanks for sharing!!
I´ve found your tutorial on the web and your explanations are awesome.
I´m Spanish and I find very easy to follow them. THANKS SO MUCH JOR YOUR GREAT JOB.
Greetings from Spain.
Wow, so lovely and detailed! Thank you!
Wow! This is a great tutorial! I was actually searching for tips on doing hand embroidery on knits (any tips?) and found this. I've been doing embroidery for quite a while but your tips for transferring and designing patterns went on to my pinterest board!
If you'd like to embroider on knit I would suggest adding maybe a water solvable stabilizer to the back then put the knit in a hoop without over stretching it. You will need to make sure you are using a rounded needle, not a sharp needle so you don't make holes in the knit. I think the key is not pulling each stitch too right so you don't pucker up the knit. You also don't want to leave it too lax either. Practice and patience will be key.
Post a Comment